Rising x Up activation
June 2023
In what was one of the most lively, exciting (and maybe a world-first?) activations we've pulled off to-date, Up partnered with Rising to create an interactive bar. Nestled amongst the amazing art created Poncili Creación, we built an interactive structure which pulsed to life whenever an Upsider made a purchase and showed live, data-based visualisations on giant LED screens.
As well as being a great moment for the Up brand, for me personally, this was an opportunity to help bring something truly unique and exciting to life by merging my interests across design, development, lighting and electronics. It also gave me the chance to work with some awesome new groups to pull it all off. 🎩tip to Woohah and Aeroplane agency and the awesome internal team that helped pull this together.
If you're only interested in the end result, take your fill of the video above. You need read no further and I bid you adieu. If you'd like to know more about the activation, read the some more about it on the Up website here and here. The rest of this post will be a deep-dive into what it took to get this all working behind the scenes. Read on to find out how we made it happen.
For me at least, my contributions began with curiosity.
About 18 months ago, we finished doing an extension on our house. As part of that, I was keen to install some under bench lighting I could control using wifi to add some indirect mood lighting. At the time, the best option was Lifx Z-strips. These are consumer grade, nicely packaged strips that are pretty expensive and have 30 RGBWW (Red, green, blue, warm white) pixels per meter. I put these in because for this particular spot I wanted a fair bit of reliability as swapping them out would/will be a real pain as the powerpoint these are driven by lives behind an integrated dishwasher.
LIFX → WLED
Soon after these were installed I stumbled across WLED. I went down a deep YouTube hole filled with people using WLED controllers (and other, way more powerful things), to control obscenely cool Christmas light installations on their houses.
I had a few ESP8266's lying around so, to experiment, I bought some 5V individual LED pixels from BTF lighting and begun a little project with my daughter to illuminate her Diagon Alley lego set.
A lot of soldering later and a fair few burnt fingers, this ended up working out pretty well…just don't look at how the magic is made.
Scaling up.
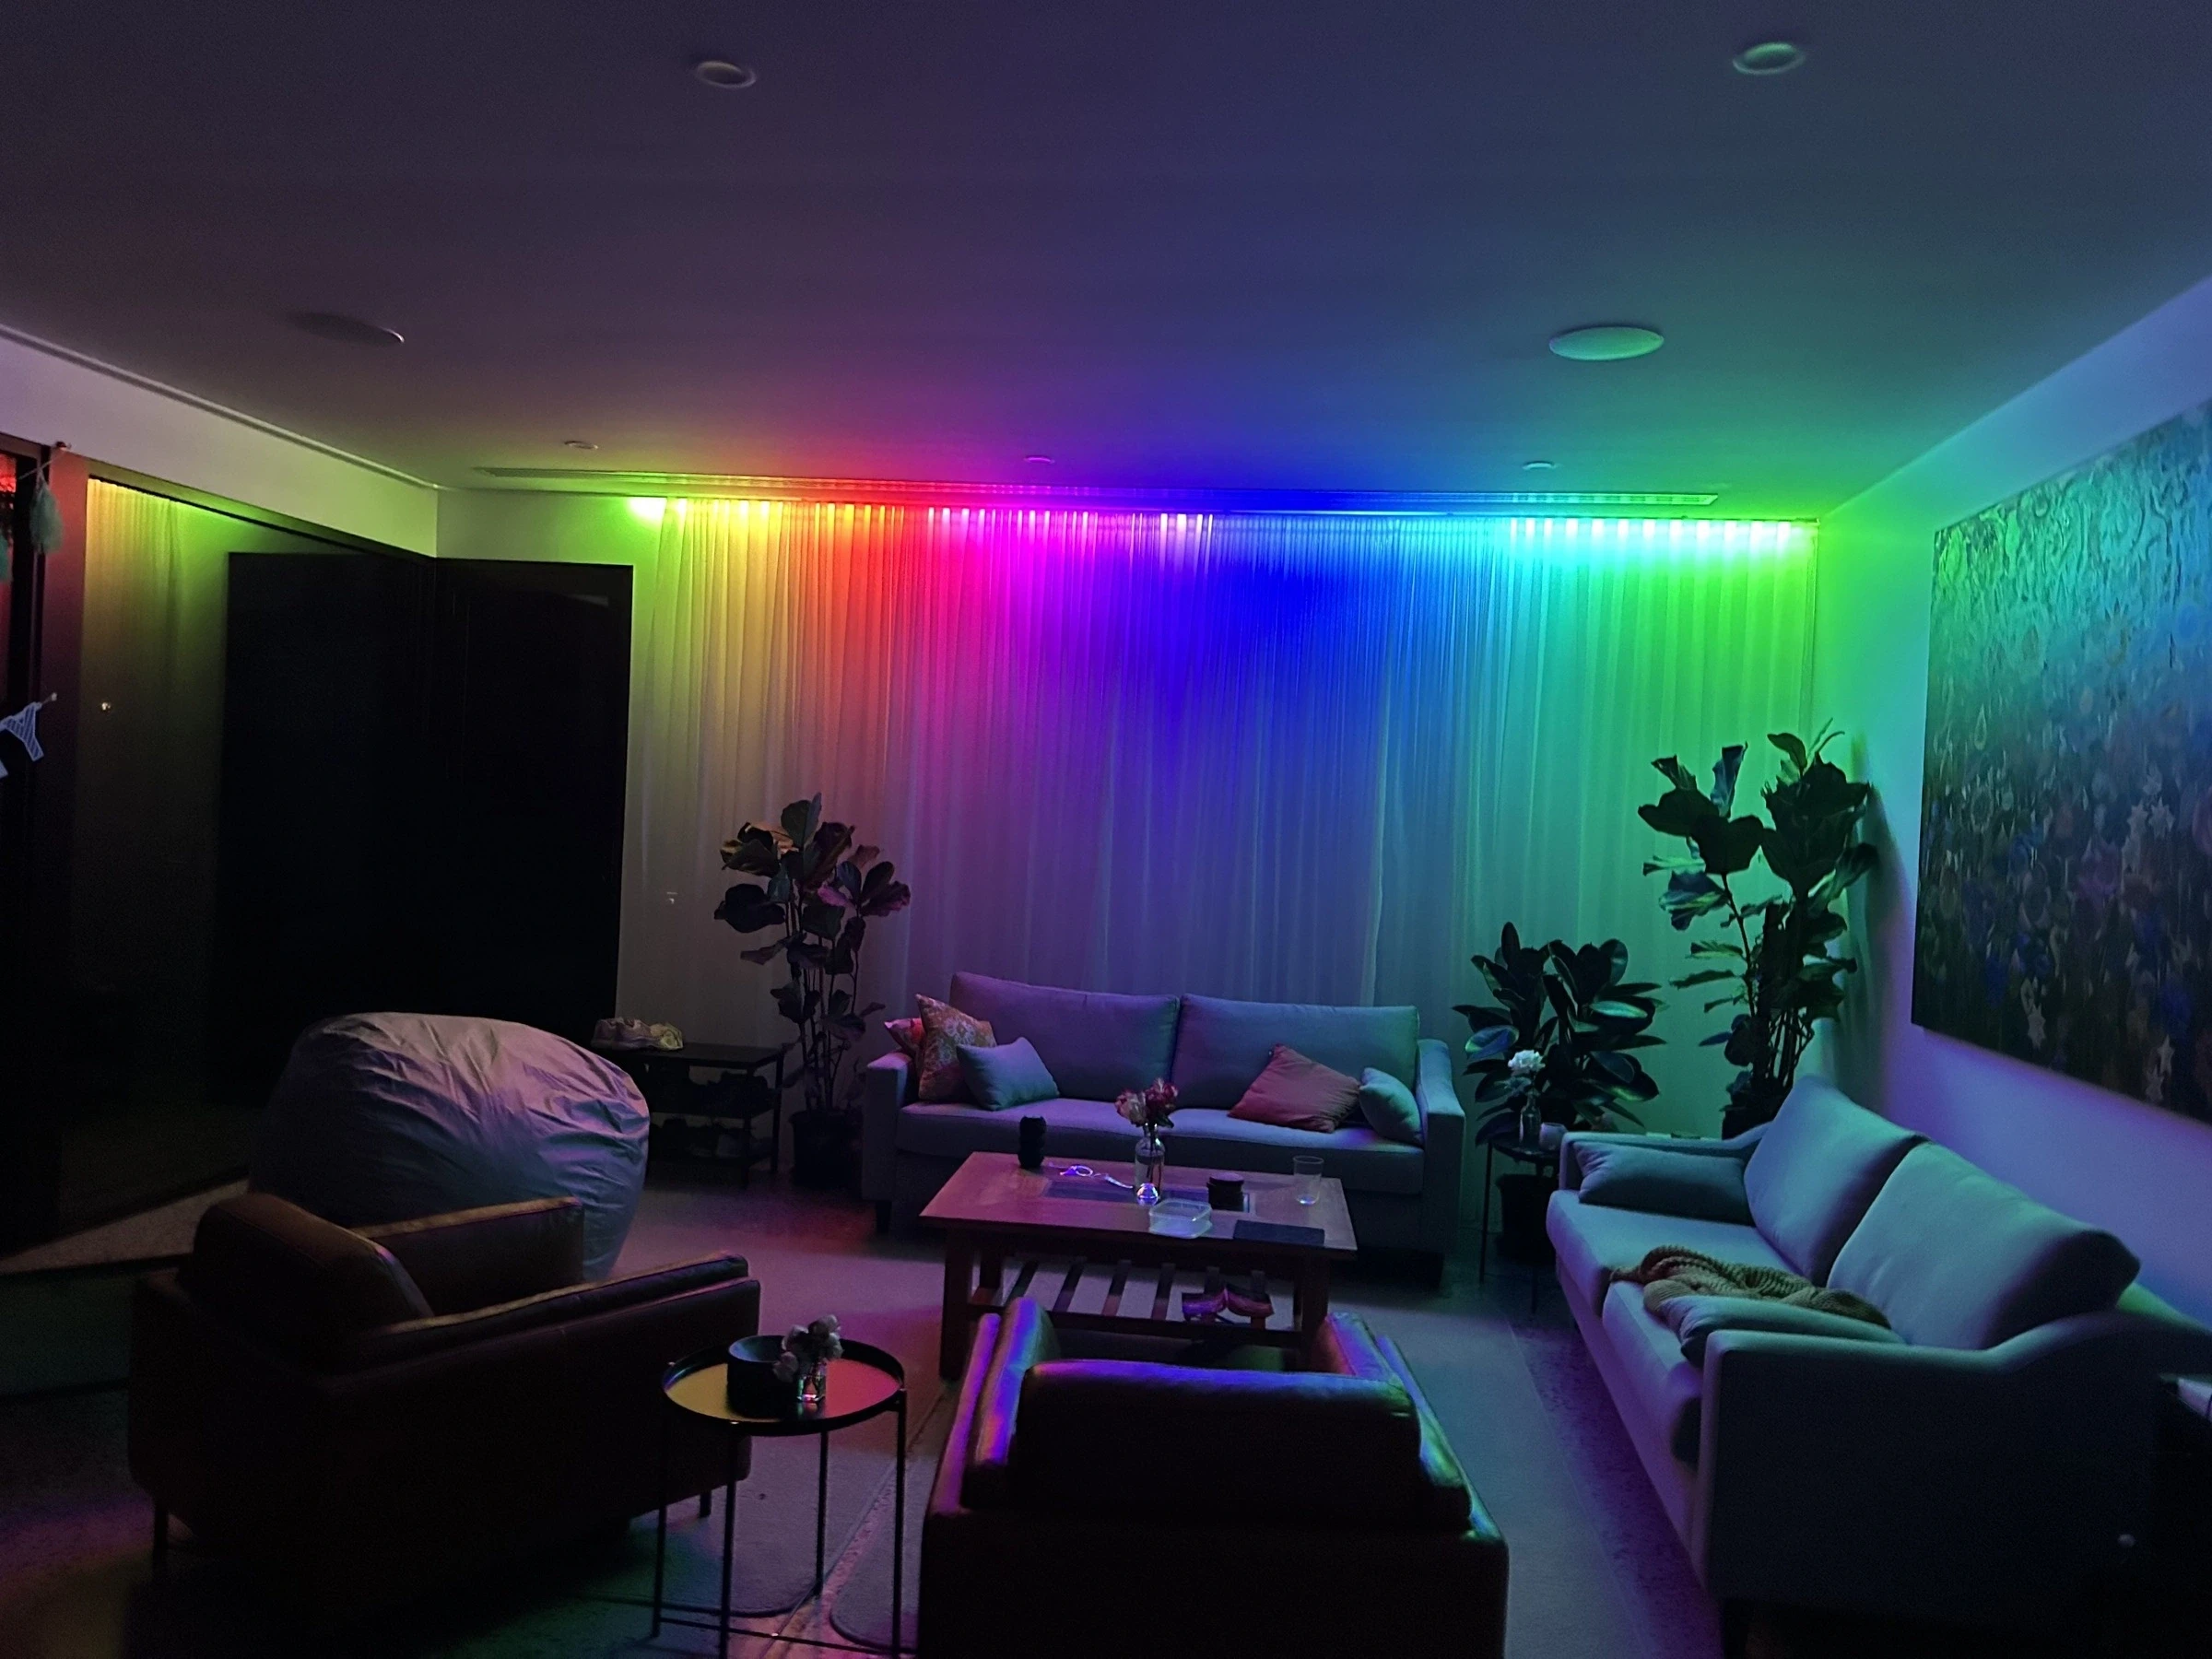
As part of the extension, we had curtains installed along some windows which wrap around the room and are about 17 meters long. As a natural heatsink (LEDs last longer when they're not too hot), I wanted to use the curtain rail to hide some LED strips, giving me a nice unobtrusive, animated lights for special occasions.
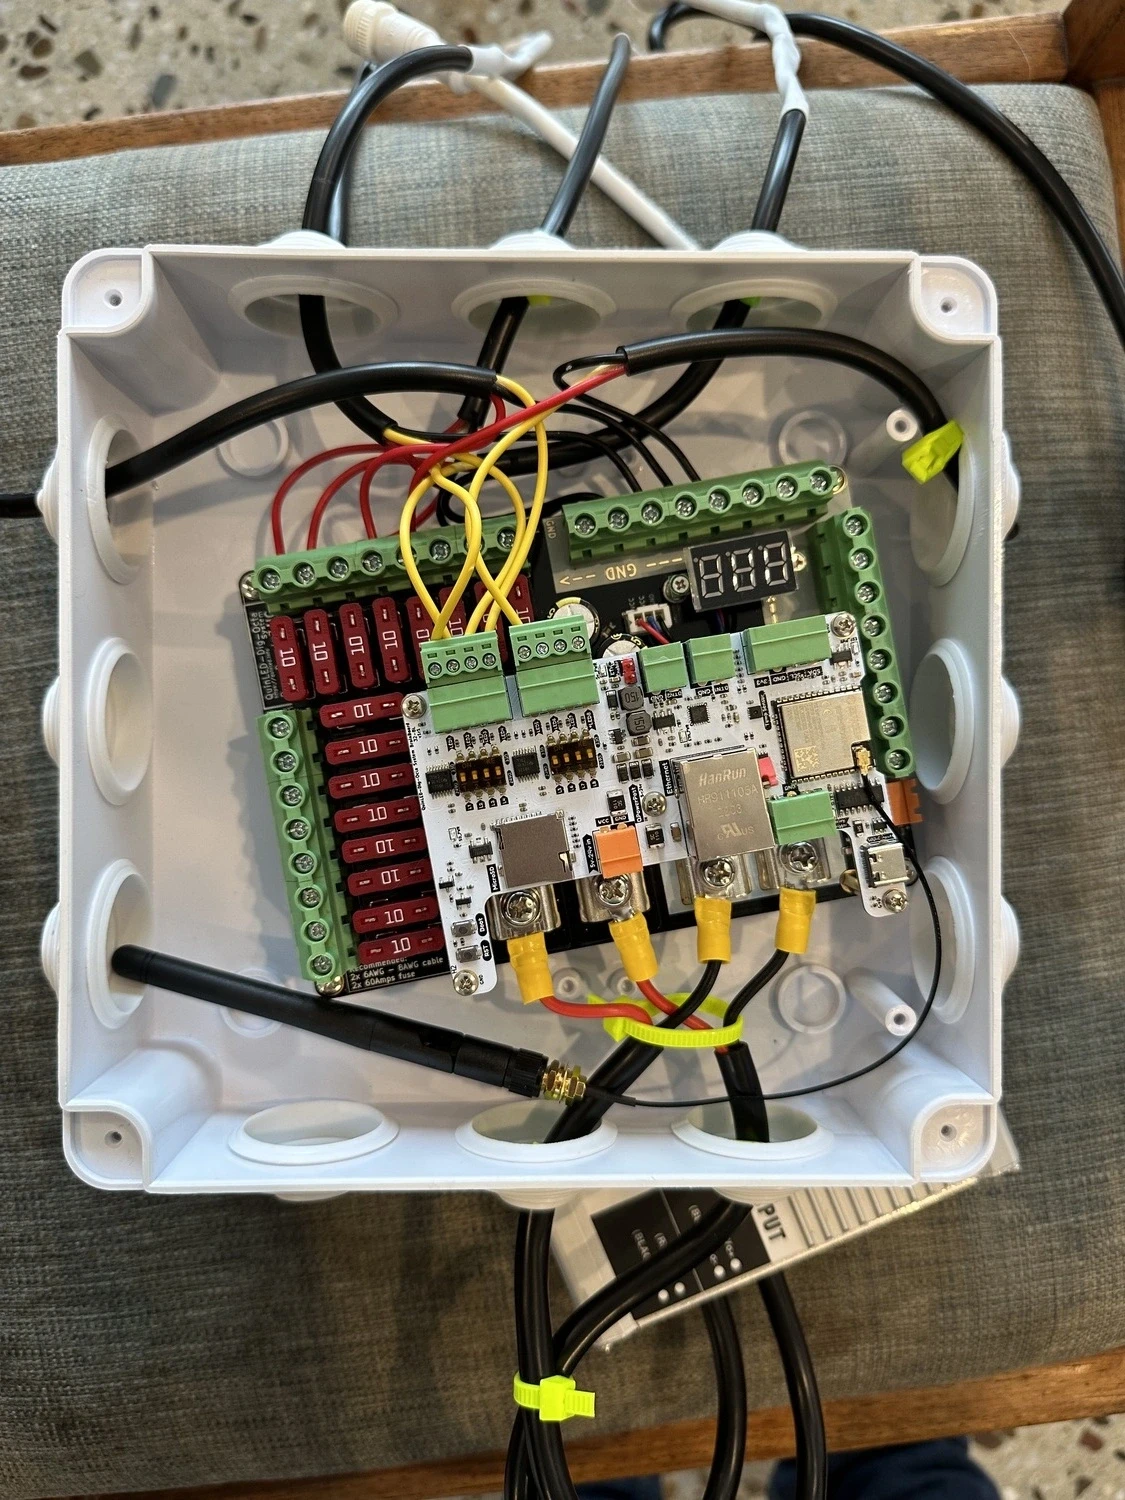
Given these would be around for longer, I wanted something better than a base model ESP8622 to drive it. During my research I came across QuinLED, a Dutch Tinkers and YouTuber who creates some really great and approachable educational content around things like voltage drop, 5/12/24v choices, power supplies and more. Among other things he sells a pre-made board called a DigQuad which looked to be exactly what I need.
So I ordered a DigQuad and a test 5m addressable COB neon strip I'd come across on AliExpress along with a 24V power supply. COB strips are far better than other LED strips where you want a smooth colour as they have a pixel density in the hundreds per meter, versus the 30 of the LIFX strips.
The trial 5m strip let me prove that what I wanted to do was possible, so long as I could overcome the issue of voltage drop. COB strips have a relatively high draw of up to 21W / meter which means that over 17 meters, I'd need up to 357W. This amount would only be needed for maximum brightness on a white colour however, as white is the most energy intensive colour for RGB strips to pump out as all the diodes need to be turned on.
The way this works is that you have:
- A 5/12/24V power supply is connected to
- a control board (like the dig quad) which
- powers your LEDS strips. For longer lengths you can also use the integrated power distribution to inject voltage as required throughout the length of the strip.
- sends a data signal to the start of the strip.
An aside: Safety first
One of the things I like the most about WLED is that it has a safety feature built in that lets you limit the amount of current the strips connected to your controller can draw. This is super important, as if you try and draw more current from a power adapter than they're rated for they can overheat and bad things can happen. Another feature I like about the QuinLED products is that they have integrated fuses. When correctly sized, this means that if you a short circuit occurs, the fuse blows and the circuit is cut, instead of generating heat or damaging the LEDs.
It's also worth mentioning that in Australia, it's not legal for non-certified electricians to work with voltages that are not Extra-Low Voltage (ELV). I've found a few definitions, but my understanding is that you're allowed to buy garden lights or LEDs from Bunnings because they run on a 12V or 24V circuit using a pre-wired power-adapter to turn 240V AC current (considered Low Voltage) into 12V or 24V DC current (considered Extra-Low Voltage).
I'm nothing if not cautious when it comes to electricity. A clear understanding of the laws around Extra low voltage is really hard to come by so before I did anything I called Energy Safe Victoria and asked them if I was allowed to use 24VDC as a non-electrician and they said I was. I also ended up doing a Test and Tag course, and becoming a "competent person" in that as well. This is somewhat unrelated, but teaches safety protocols around more standard plugs, leads and appliances and is great to understand.
Unless you're a "competent person", another thing you need to do in Australia is make sure you buy Australian certified power adapters that have a 240VAC cord pre-attached.
On YouTube you lots of bare-wire power supplies commonly on YouTube (they often look like this), but they are almost always overseas and it's not legal to use them here unless you're a sparkie. Even then I think they can only be used in specific protected enclosures because they have a high potential to have easily exposed low-voltage (240V) wires. Consumers aren't allowed to touch low voltage equipment for good reason and no amount of fancy lights is worth your safety. Electronics you use in Australia must have by certified as well - as an example this page says the device is certified for us in Australia.
Do your own research and seek your own advice here.
Scaling it up
Now that I had my test 5M strip working, I was able to scale the curtain rail up to its full 17m length by joining together 4 x 5m strips and cutting the last to length.
As the strip was now much longer, I needed to overcome voltage drop by running seperate power injection lines every 5m along the strip. This made is to there were no spots where the LEDs couldn't draw enough juice to run properly. An interesting fact I learnt is that different colours of LED diodes use different amounts of power. This is why LEDs receiving less voltage can sometimes eek out run redder colours. This is because as red LEDs take less energy to illuminate than green or blue LEDs.
Voltage drop and wire guage is confusing but a lot of what I leant boils down to the fact that copper is expensive, and that DC electricity needs quite thick wires to travel over much distance at all, especially where a fair bit of current is needed. It's fine to have "pigtails" over really short distances, but when you're running 5 meters, 10 meters or more, there isn't really a good substitute for more copper to avoid overeahting the wire and also to get enough current to the LEDs. If you're interested in this area, I'd recommend the QuinLED site.
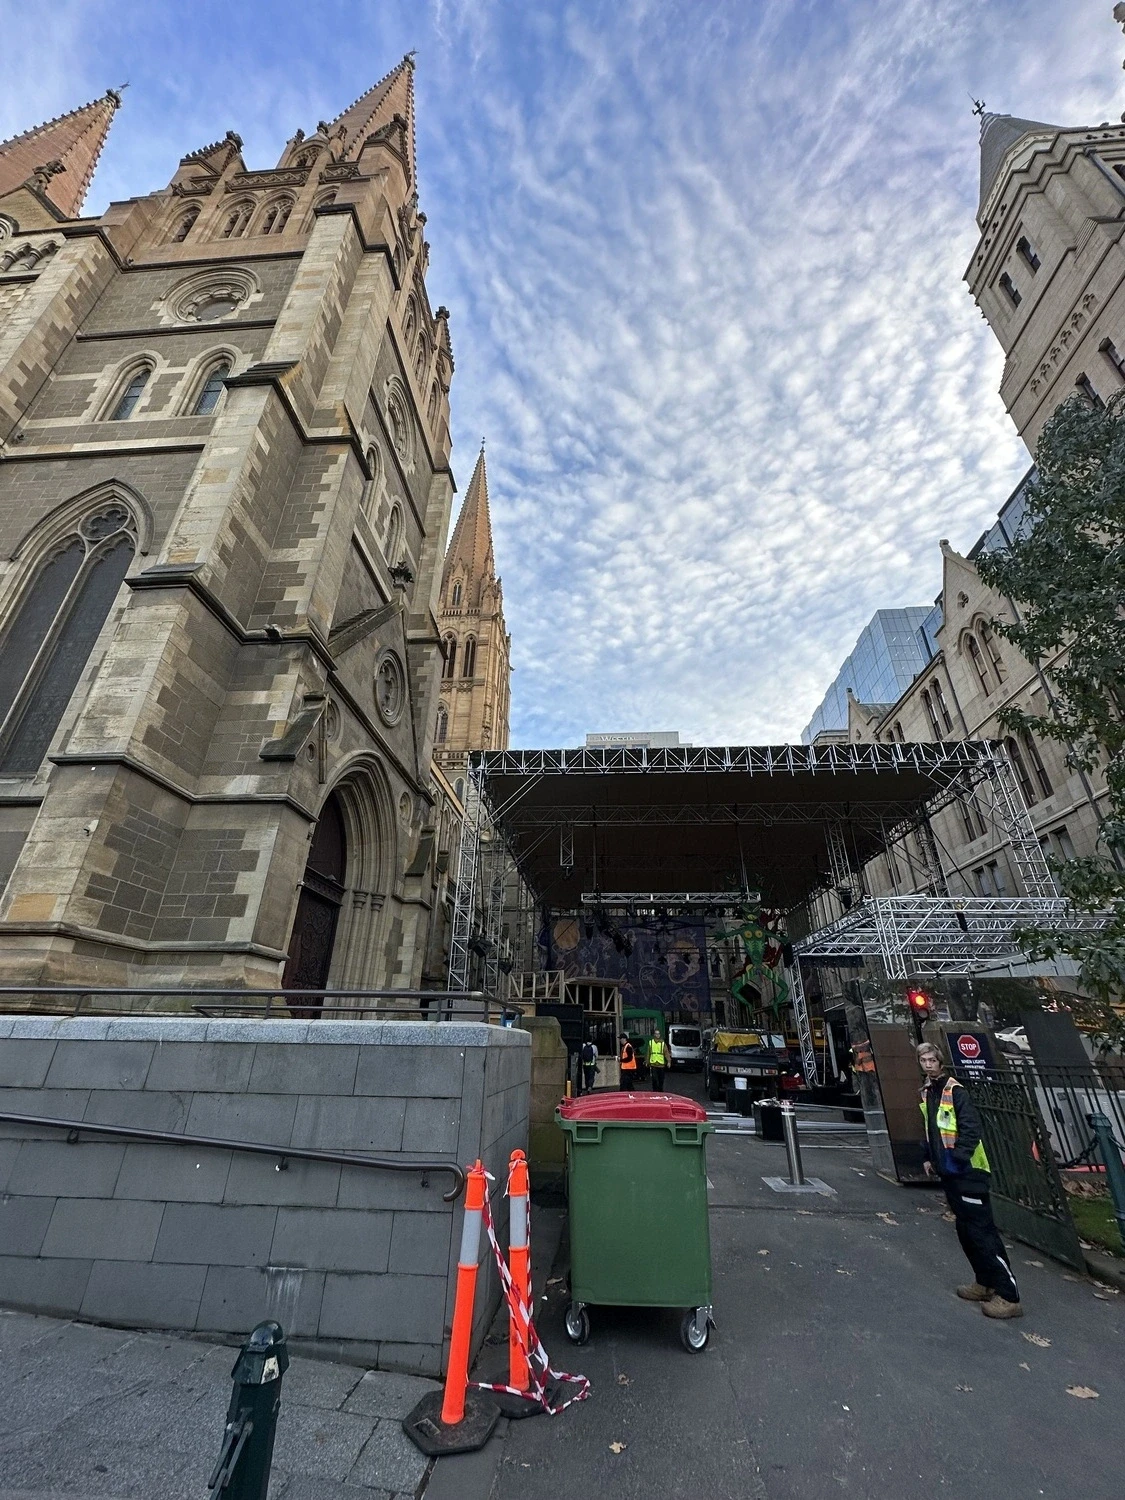
Rising
So basically all of this meant that once we'd agreed to parter with Rising on Night Trade and Pete, Sharma and Aeroplane came back with a design concept that made pretty extensive use of LED lights, I was excited. Initially, knowing what it'd take, and because we didn't have any of the kit required, I was keen to not do the build myself. We were working with an external group - Woohah - who could do this commercially and provide most of the LED screens for visualisations and analogue LEDs.
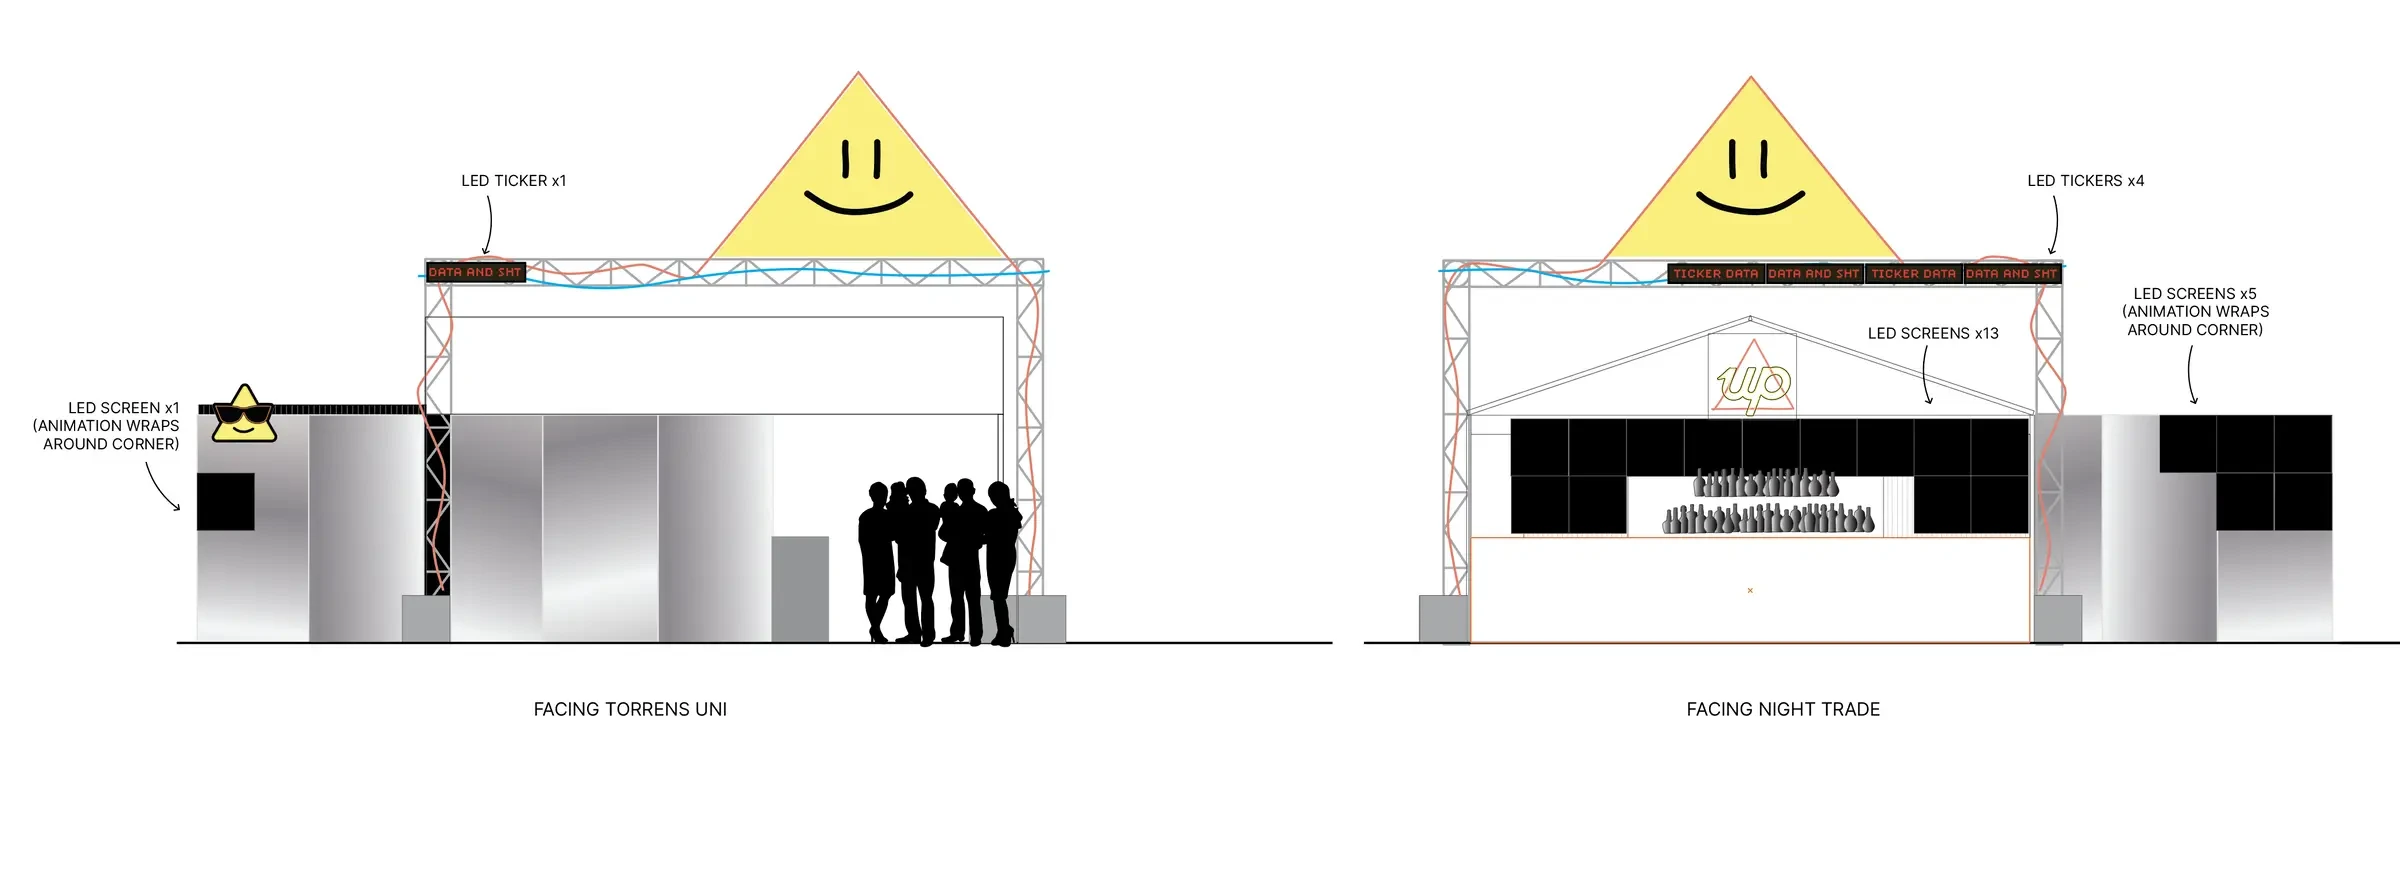
Note: analogue LEDs are the ones where you can control the entire strip to be a specific colour, but not address individual parts of a strip, so they're usually much cheaper.
We soon learnt that individually addressable LEDs were going to be too much for our budget. With a bit of research I realised we could probably build our own for a small fraction of the rental price. It was important to us to get strips that were individually addressable as we wanted use some wizardry to illuminate the structure when a payment was made by an Upsider at payment terminal to make it super obvious that there was a connection between the card or digital wallet tap. This meant we had our hearts set on strips that could really go to town animation-wise.
API controlled WLED lights
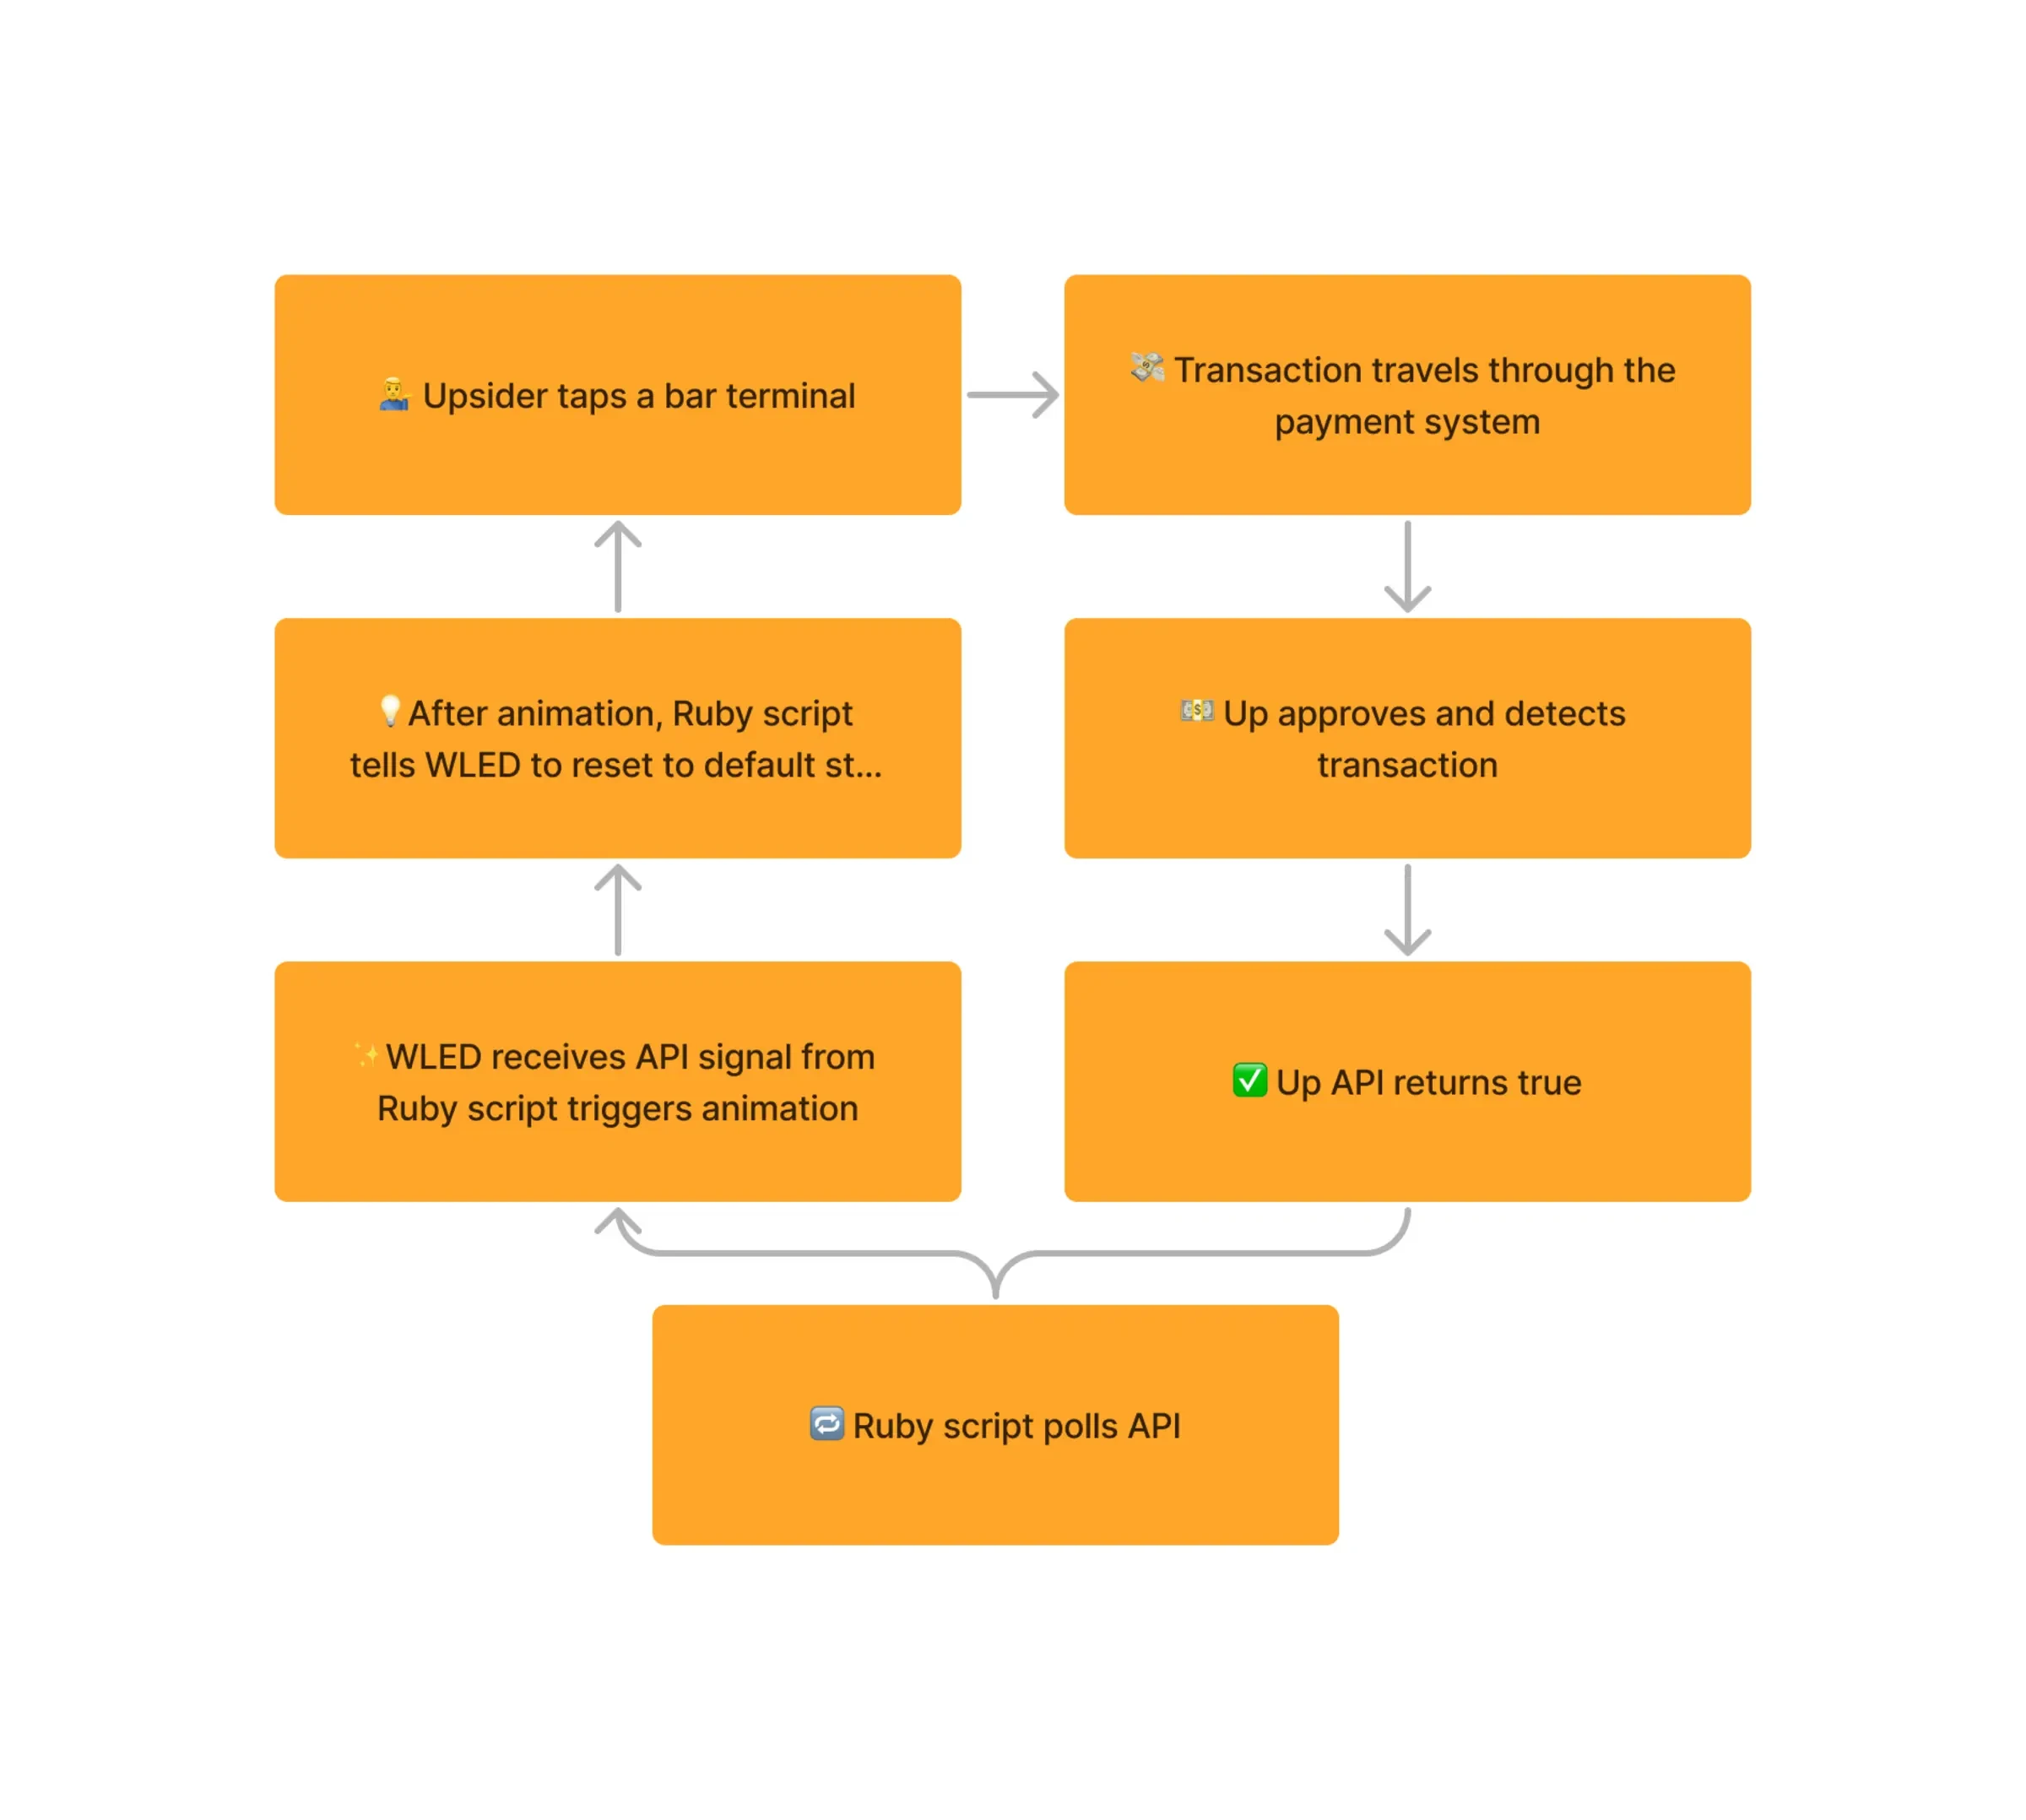
The first thing I needed to prove before I could reassure myself that doing this was possible was to see if I could write a ruby script to trigger the my curtain rail lights via API.
Fortunately, WLED has a JSON API, so with a small test script and a bit of mucking around to see how it all worked, I was able to change the effects on my curtain lights every few seconds simulating a transaction being made.
Now to make it pretty
With API triggers working, I wanted to see how far I could push the strip animations. By hanging the strips to the underside of the bar tent, which was transparent, I thought it'd be cool if I could get them to pulse sequentially and draw your eye towards the Up logo we intended to position at the front of the tent.
By defining segments in my test strip, I was able get this working on a single strip, which was really encouraging and gave me the confidence that we'd be able to pull off something cool.
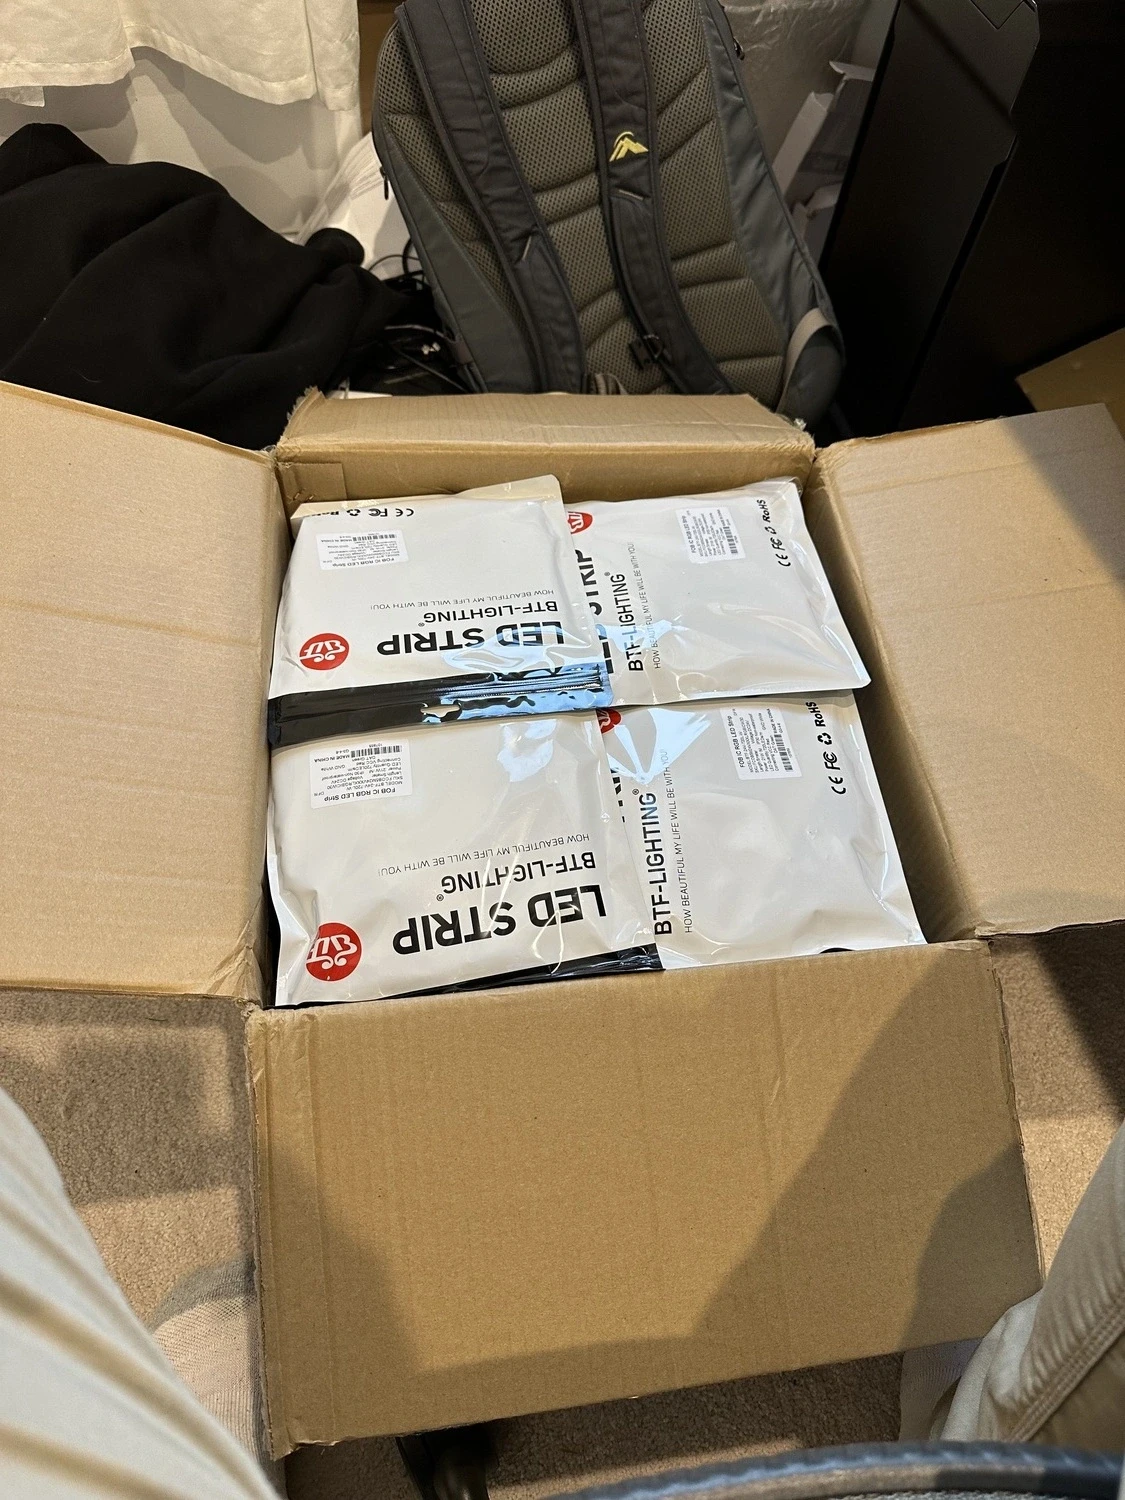
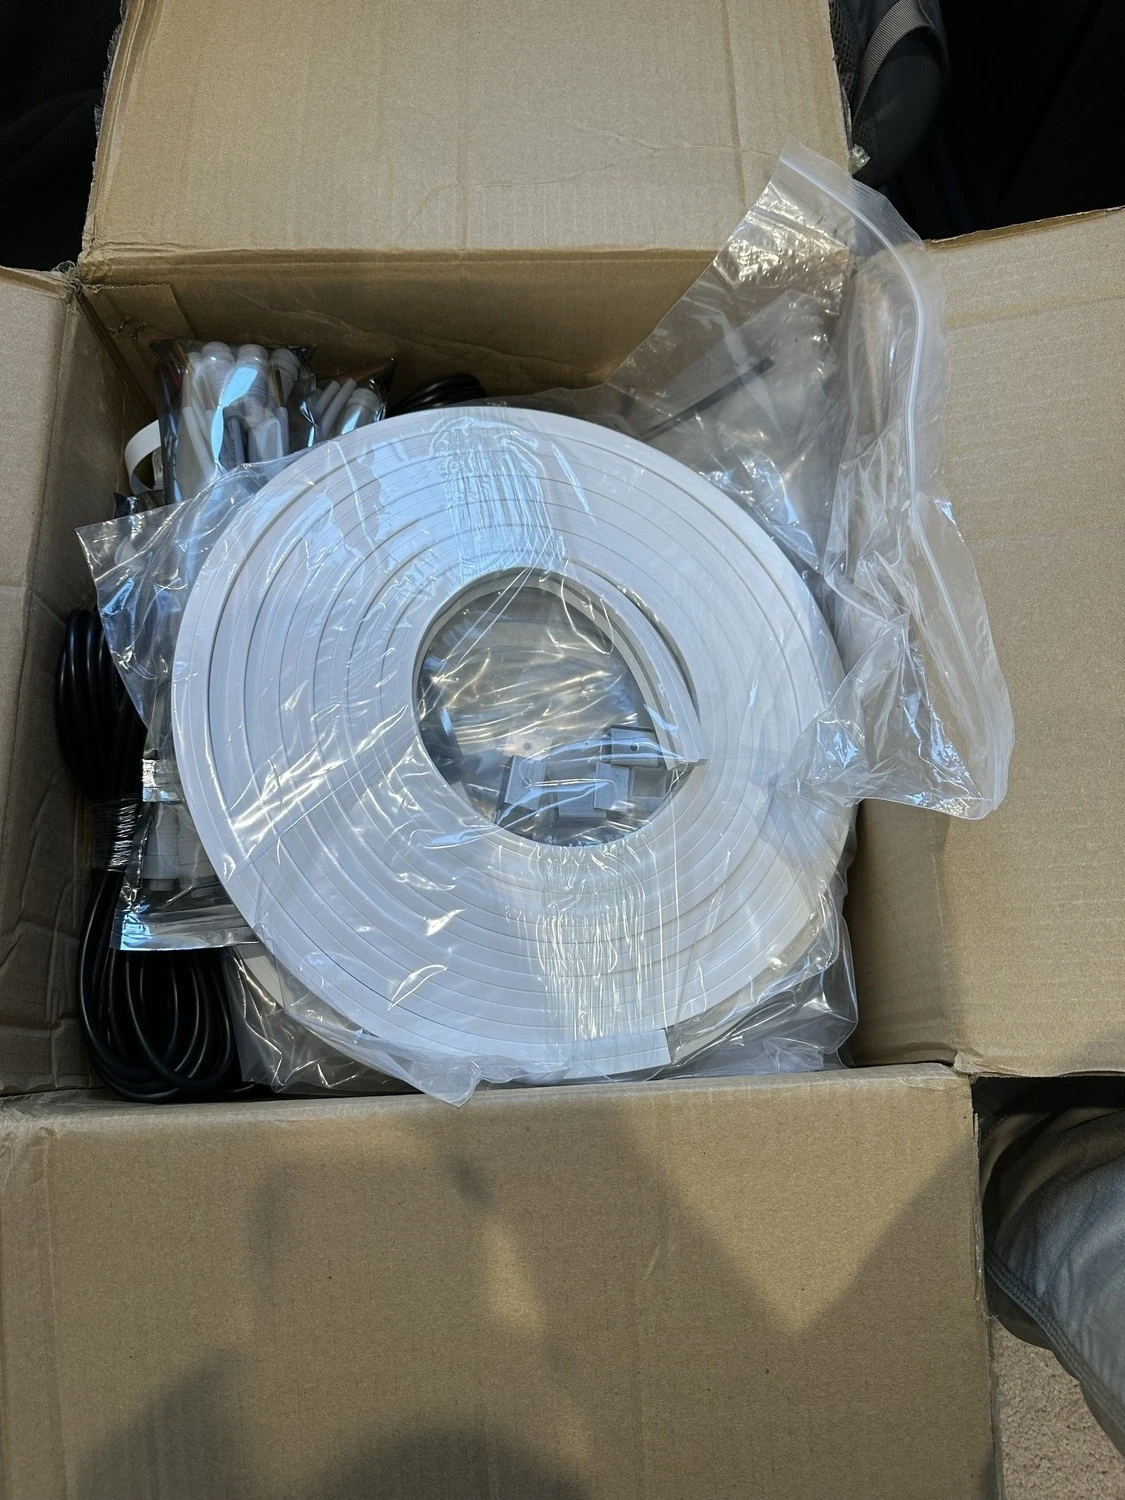
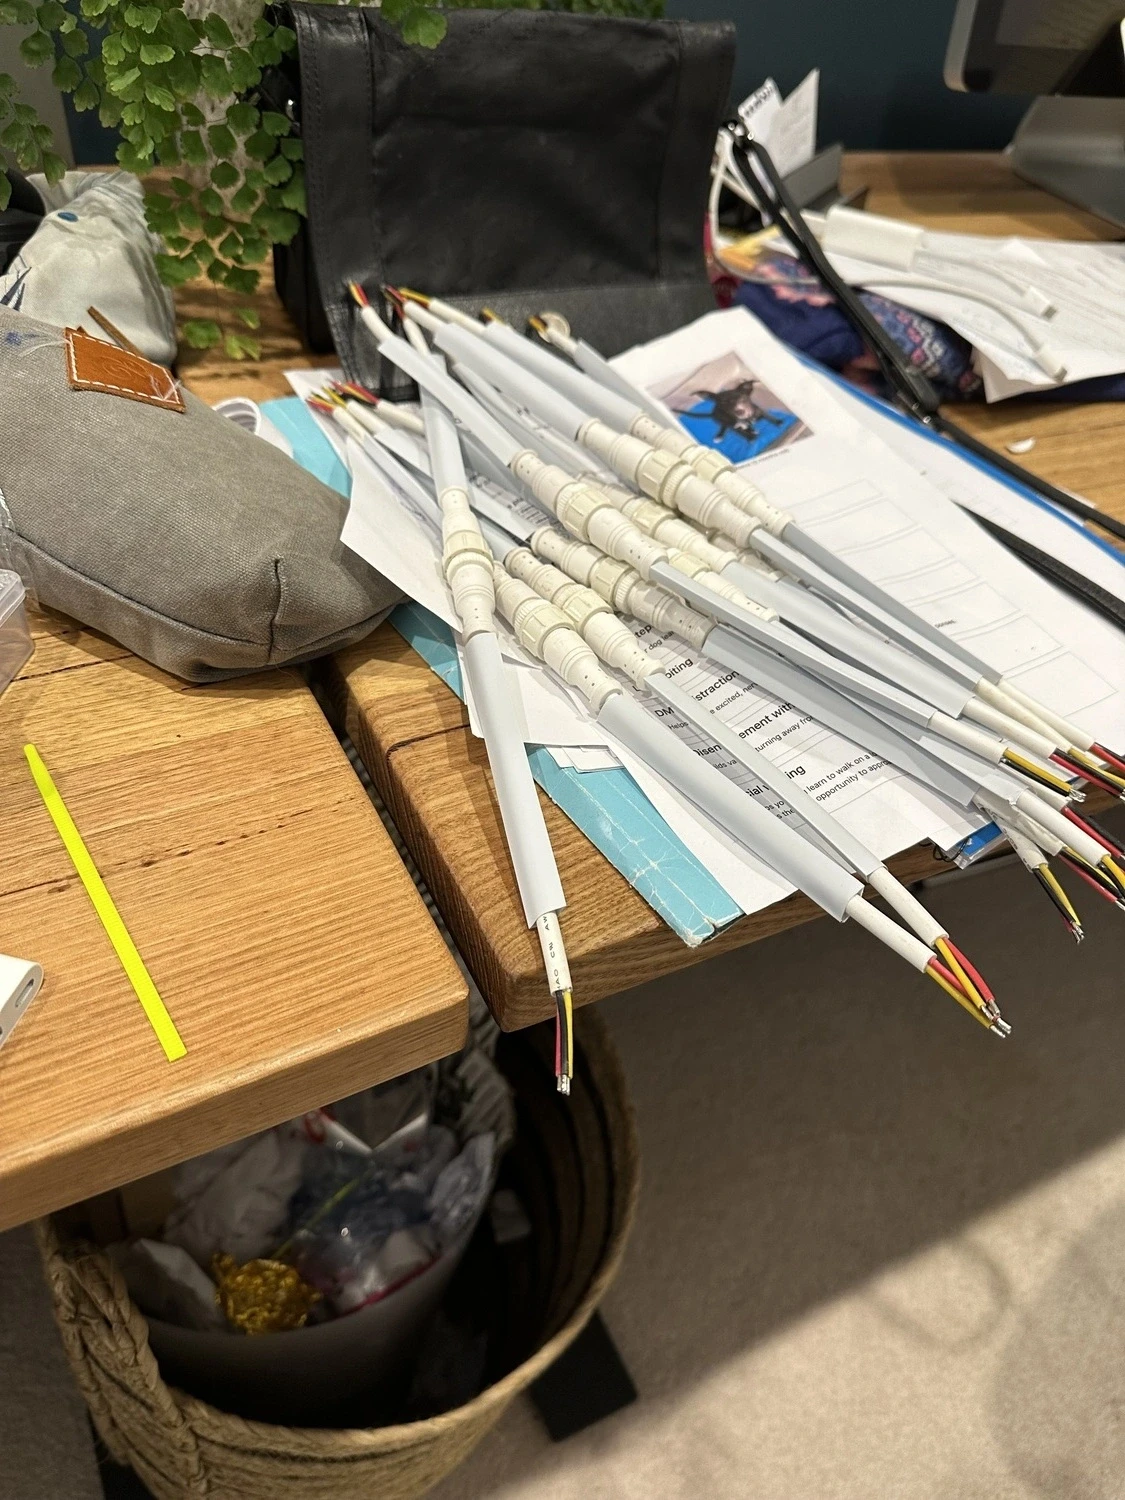
With this proof of concept done and with a few weeks to spare, I placed some orders from BTF lighting for 10 x 5m COB strips, waterproof silicon sleeves, waterproof connectors, QuinLED for some DigOcta power distribution boards and brain boards and some Australia supplied Meanwell IP67 waterproof, corded LED drivers and waterproof project/junction boxes to hold the brains 🧠.
Things started to arrive just in time, so a few weekends were lost to vacuuming twine through the silicon sleeves, threading the LED strips into them, soldering and heat shrinking the waterproof connectors on and building out the brain boxes.
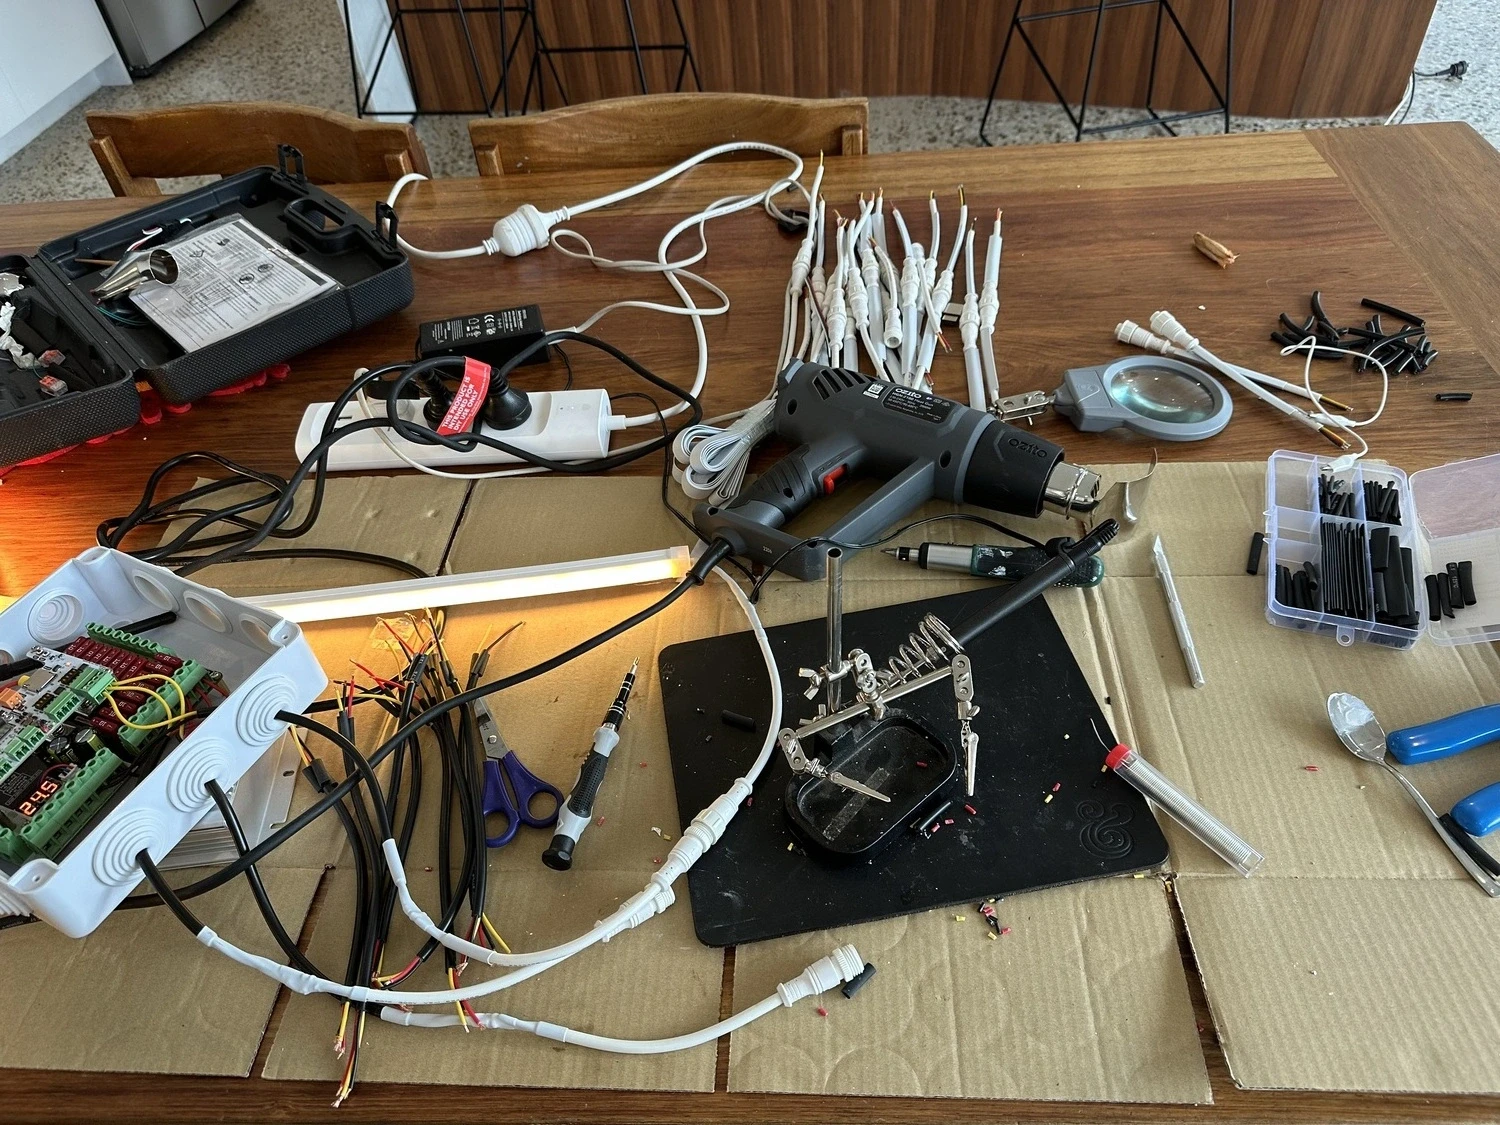
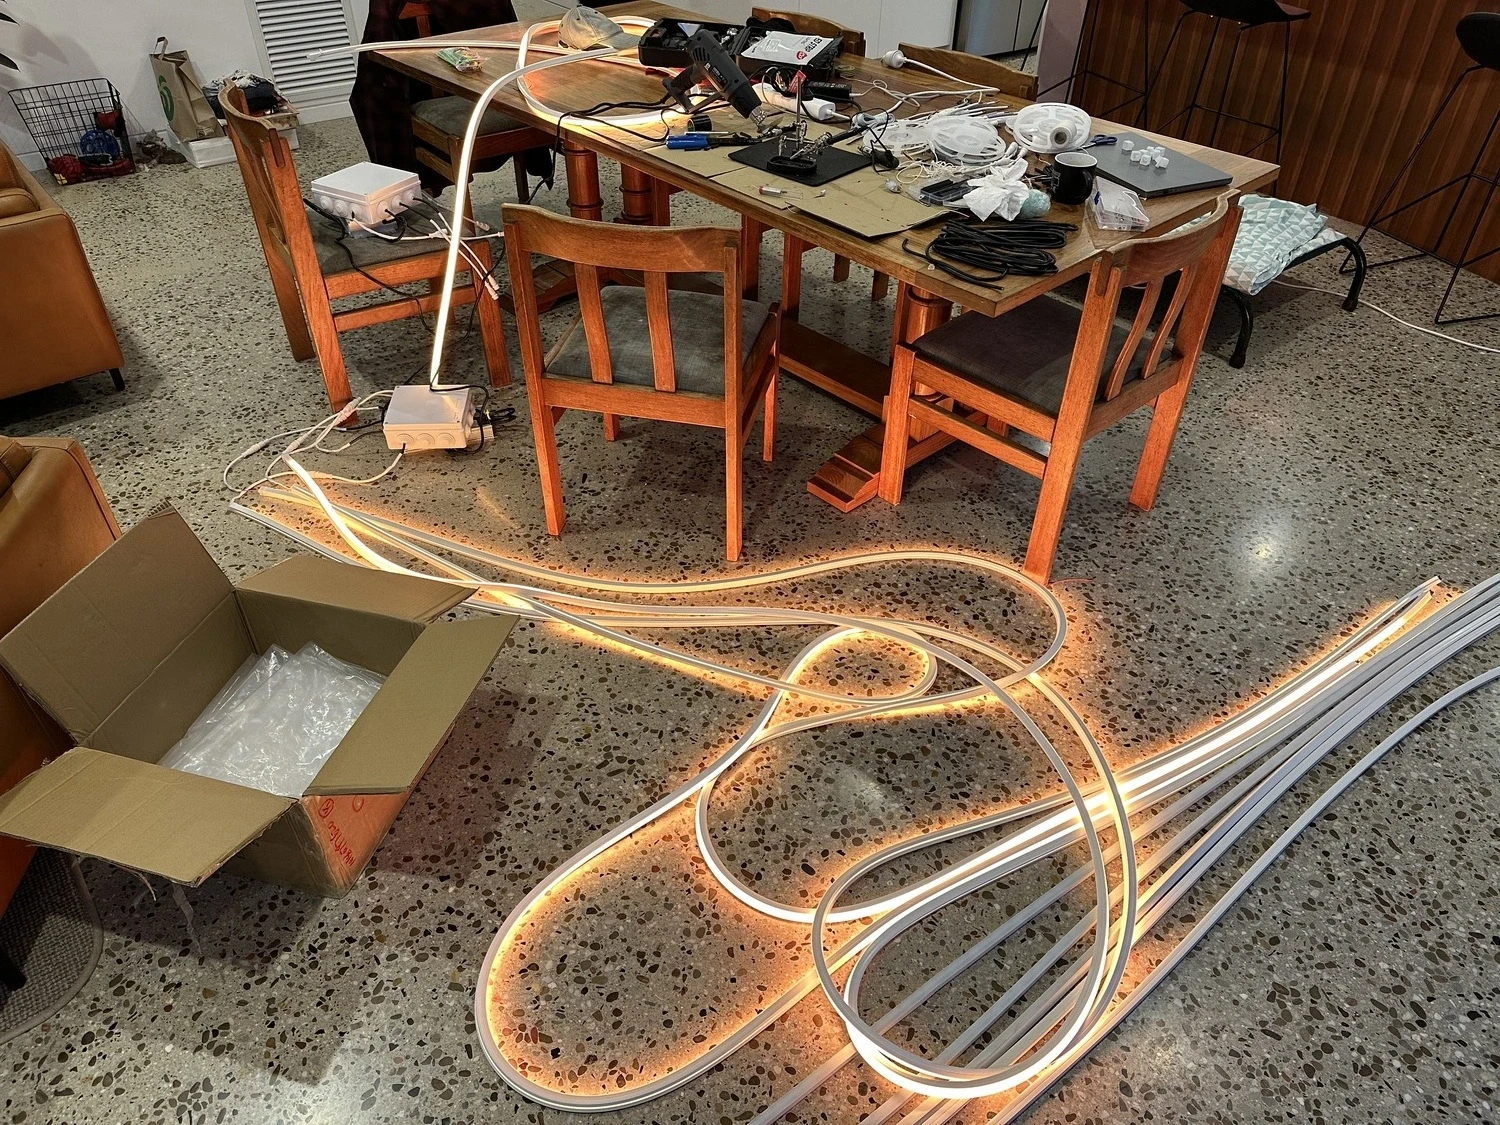
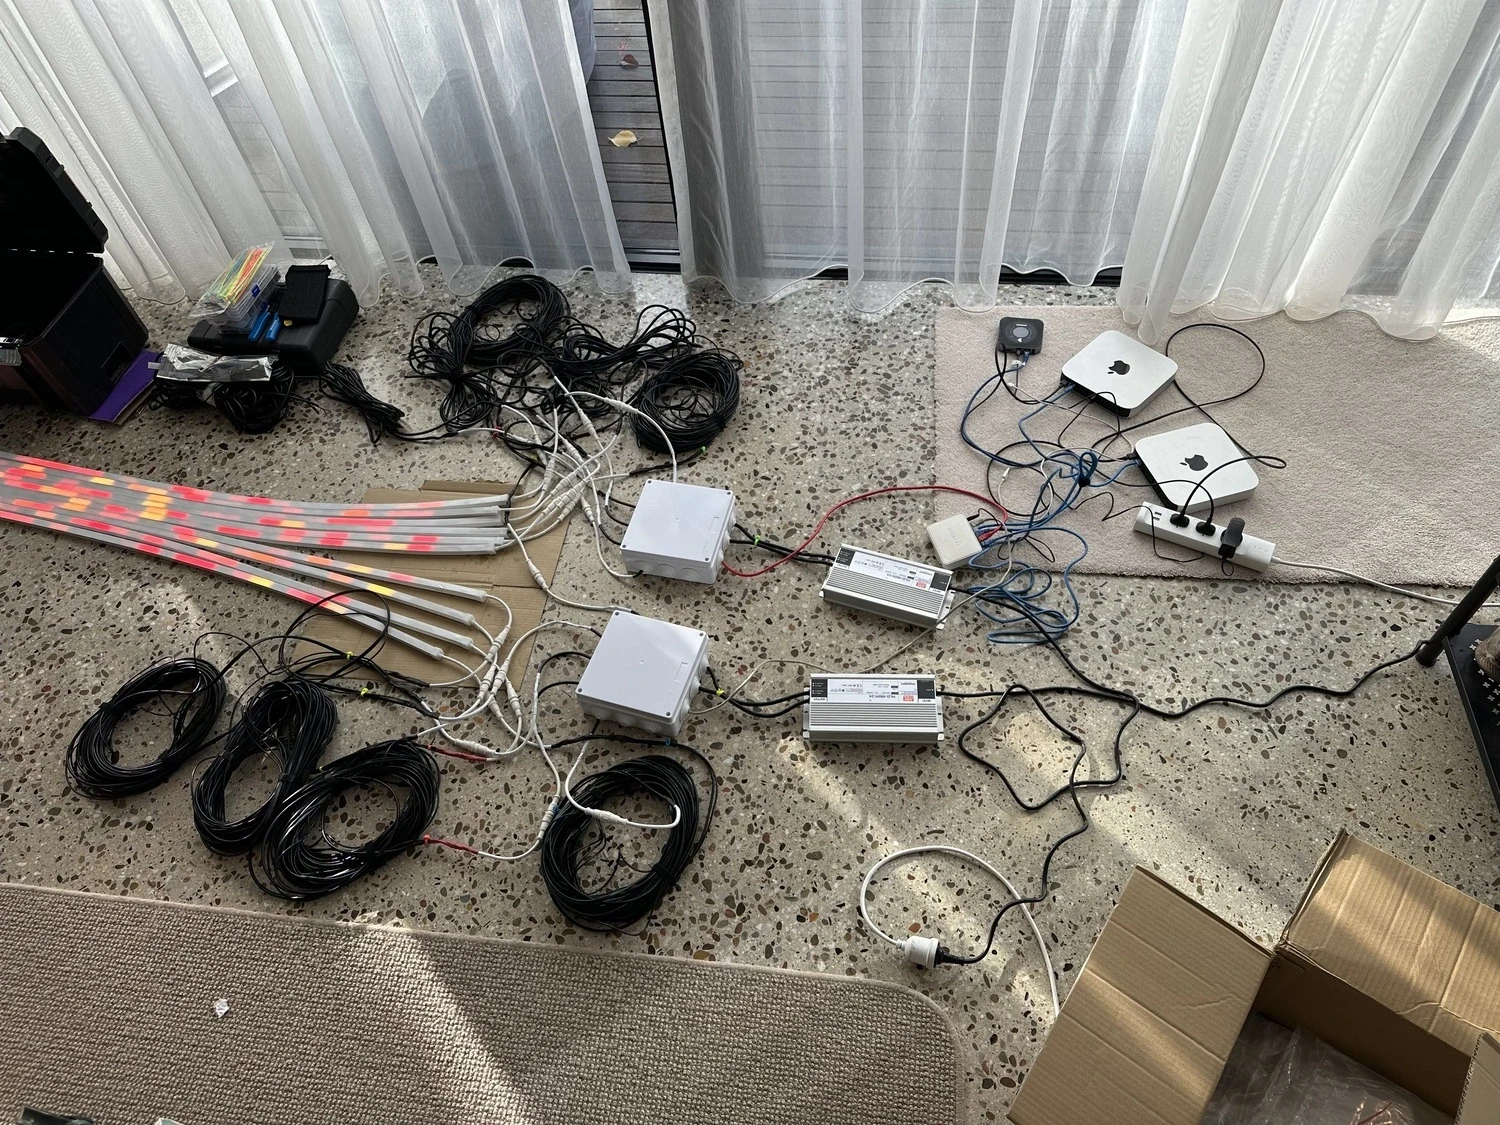
After what seemed like an eternity of soldering and wire stripping, I had built a rainbow road in my living room.
The next set of challenges involved:
- trying to get the syncing working across two WLED controllers instead of just one and syncing the pulsing effect so they would sequentially trigger from one strip to the next.
- Adding in a "default", calm state and a more frenzied "transaction" state and hooking this into our production API.
- Triggering my COB strips at the same time as the analogue LED strips and smoke machines attached to the rest of the structure, which were being controlled by Woohah's control system using a different OSC protocol.
- I also needed to set up a really durable and resilient Mac mini / 4G modem combo to run a web server powering the LED displays that would run visualisations and run the ruby script polling for transactions.
Let's break it down.
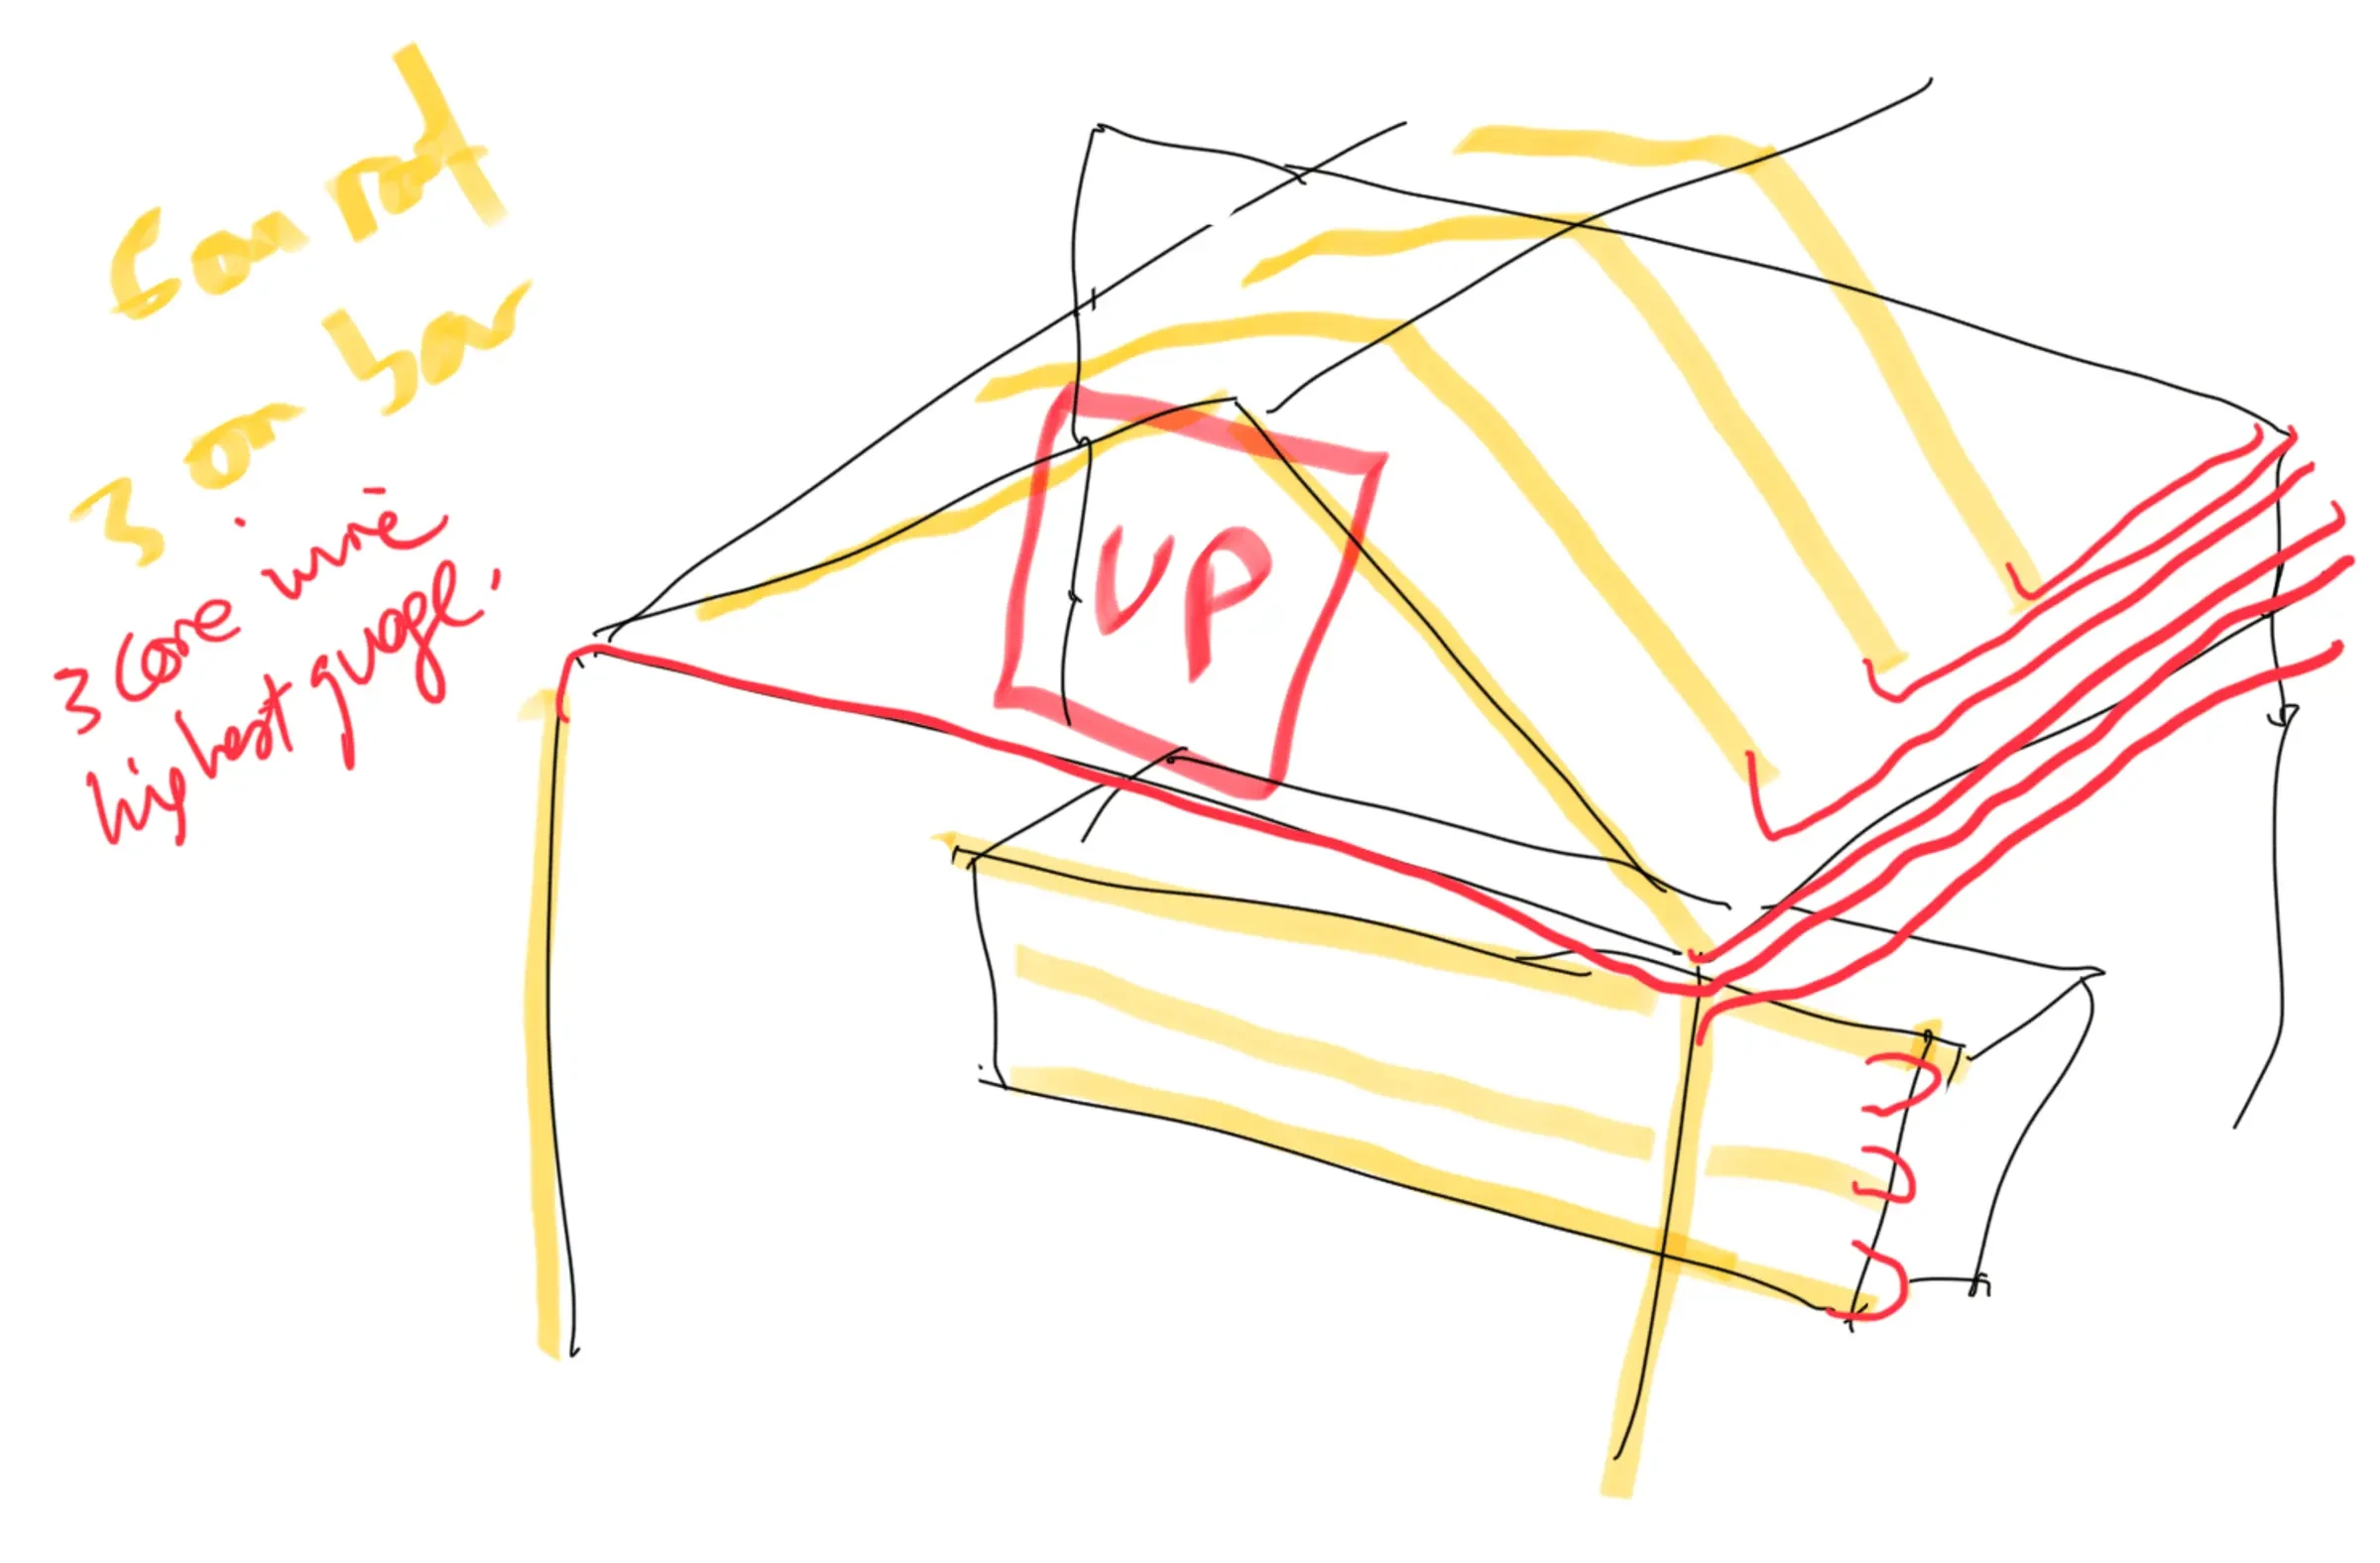
Working across two LED controllers.
With my initial "pulse" effect, I needed to make it so that each strip was triggered, in-sequence, after a short delay.
At this point I have:
Two LED drivers
↓
Each powering a WLED controller (with it's own IP address)
↓↓↓↓↓
Each powering 5 x 5m light strips
This meant that if I got the order of the strips right, I could iterate through each of the controllers, then each of the strips with a series of HTTP calls via my ruby script to give the appearance of a series of pulses. After a fair bit of experimentation, although I got really close, I couldn't get this working as smoothly as I wanted, so I took an alternative route and changed the effect to one that would look ok all changing at the same time. I suspect the API calls were too close together, and that the ESP32s needed more time to receive them one after the other. There was probably another way to make this happen by building a custom effect or playlist, but I was out of time for now.
A default "always on" and more frenzied "transaction" state
By this point Andy had the Up API working and test firing whenever a Bakers Delight transaction was made Australia-wide. This meant I could test using a web API. When a transaction was detected, the API would return true for 5 seconds, then revert to false. This gave me a trigger I could use to change effects from a nice subtle orange/yellow gradient animation through to a marching ants style effect.
Here you can see that happening:
Triggering IC COB strips at the same time as analogue LEDs and smoke machines.
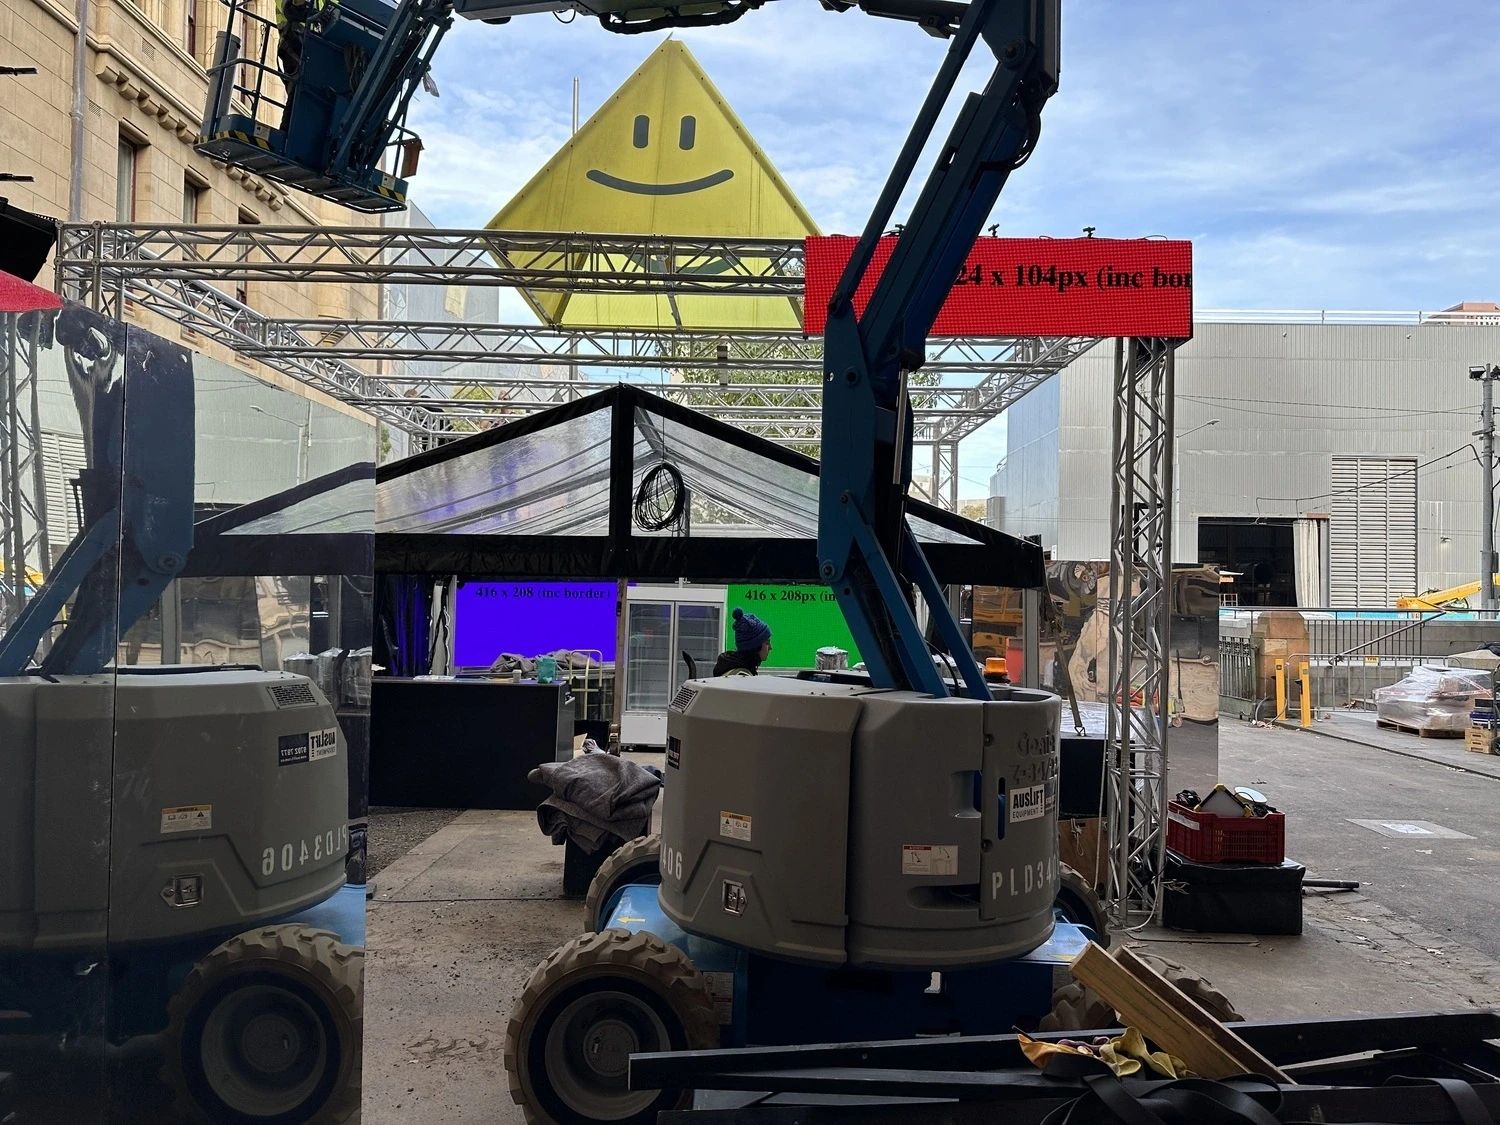
The COB strips I'd been working on until now were only part of the puzzle. We were also setting up a big truss structure above the bar to hold a monolithic and illuminated Zap. To bring it to life we worked with Woohah (an events tech company) to build that structure and supply the LEDs. Shout out to Carl, Leith and their team - they were fantastic to work with.
To make sure things would work, I headed over to their super cool warehouse experiment with triggering their DMX controller using a Ruby script.
Fortunately their controller used what's called an OSC protocol commonly used to control all aspects of stage lighting and effects so after integrating the Ruby Gem OSC Ruby we could test triggering a giant video screen they had lying around when someone bought bread somewhere in Australia.
It worked and Woohah was able to use their software to receive the trigger and design a sequence for the default and transaction states from there. The analogue sequences were a lot simpler, but still really effective as there was another 100m of LED strip attached to the truss structure.
Much success!

Making Mac minis event-ready resilient.
Having built the set up for an activation we did for our Maybuy product, I'd learnt that Mac Minis we had retired from use in our Continuous integration system were especially well suited for events. With no screen damage and a small and way more powerful and reliable than a Raspberry Pi, the trick is to make them resilient so they can recover from power outages and restart without no or minimal user intervention.
We need the minis to:
Mac mini 1
- Run the trigger script, polling every second
- Drive the main bar screens
Mac mini 2
- Drive the secondary screen.
To make the computers more self-sufficient:
- I fixed their IP addresses and subnets. We also used ethernet for the WLED controllers and fixed their settings, so they could always be addressed by the control script.
- Used ethernet connections to a switch and Telstra 4G nighthawk modem/router (which importantly also has an ethernet connection)
- Turned off screensavers and any energy saving features.
- Set up a daily restart at 4pm, right before the event so any logs or stalled processes could be cleared out and we could start the evening fresh.
- Set up the computers to login automatically without a username or password.
- Used Cursorcerer to automatically hide the cursor on boot.
- Used automator to run automatically run the Ruby scripts after login.
- One of these scripts started the ruby script polling our API to trigger the structure animations
- The other started a node web server on each mac to run the LED screen visualisations and then opened chrome in Kiosk mode full screen.
- Set up screen sharing on both the minis so we could Remote Desktop in from another Mac and drive them for testing. This actually came in super handy. At one point I was sitting in a van, while a friend drove us to the beach, on a zoom call, remote controlling @rukmaldesilva's laptop, which was in-turn remote controlling a Mac mini onsite, which was driving the LED screens 🤯
All this meant that even if the power went off (which it did several times), the computers would restart and things would start working again without needing someone to head out to site. We did hit a few roadbumps with the visualisations slowing down over time, but this was probably some sort of memory issue we hadn't foreseen. Restarting daily seemed to solve this.
Putting it all together on-site
On-site it took a day to get everything wired up and working alongside Woohah, who provided all the trusses, LED strips, and the skills needed to work at height using cherry pickers without killing oneself.
The dreaded signal and voltage drop
By far the hardest part about setting things up onsite was the issues I hit with data signal loss over distance. Once everything was installed, some of the strips were flickering erratically which was really distracting. It turns out that this was a form of voltage drop in the 5V data wire. While this had worked fine at home all looped up, on-site the distance and proximity to other cables meant the physics had changed and the issue crept in..
To get around this I first tried shortening all the cables I'd made which was super tedious. I have newfound respect for roadies who keep their cables neat and tidy as opposed to being rats nests.
This solved the flickering on some the strips, but for others it kept happening on certain effects and when the lights were set too dimly (or to zero brightness). While this wasn't a problem with the initial requirements, some last minute creative instructions meant that we needed to be able to operate the lights at more dimmer levels than planned.
Ultimately, I really needed to RTFM. Talking with Quindor from QuinLED, it turned out there was a switch on the controllers that would boost the sigal, making it more reliable over longer distances under some circumstances.
After flicking those switches, and adding in some logic to turn the default state to "Off" after 10pm during performances, I had something that was far more reliable and less flickery.
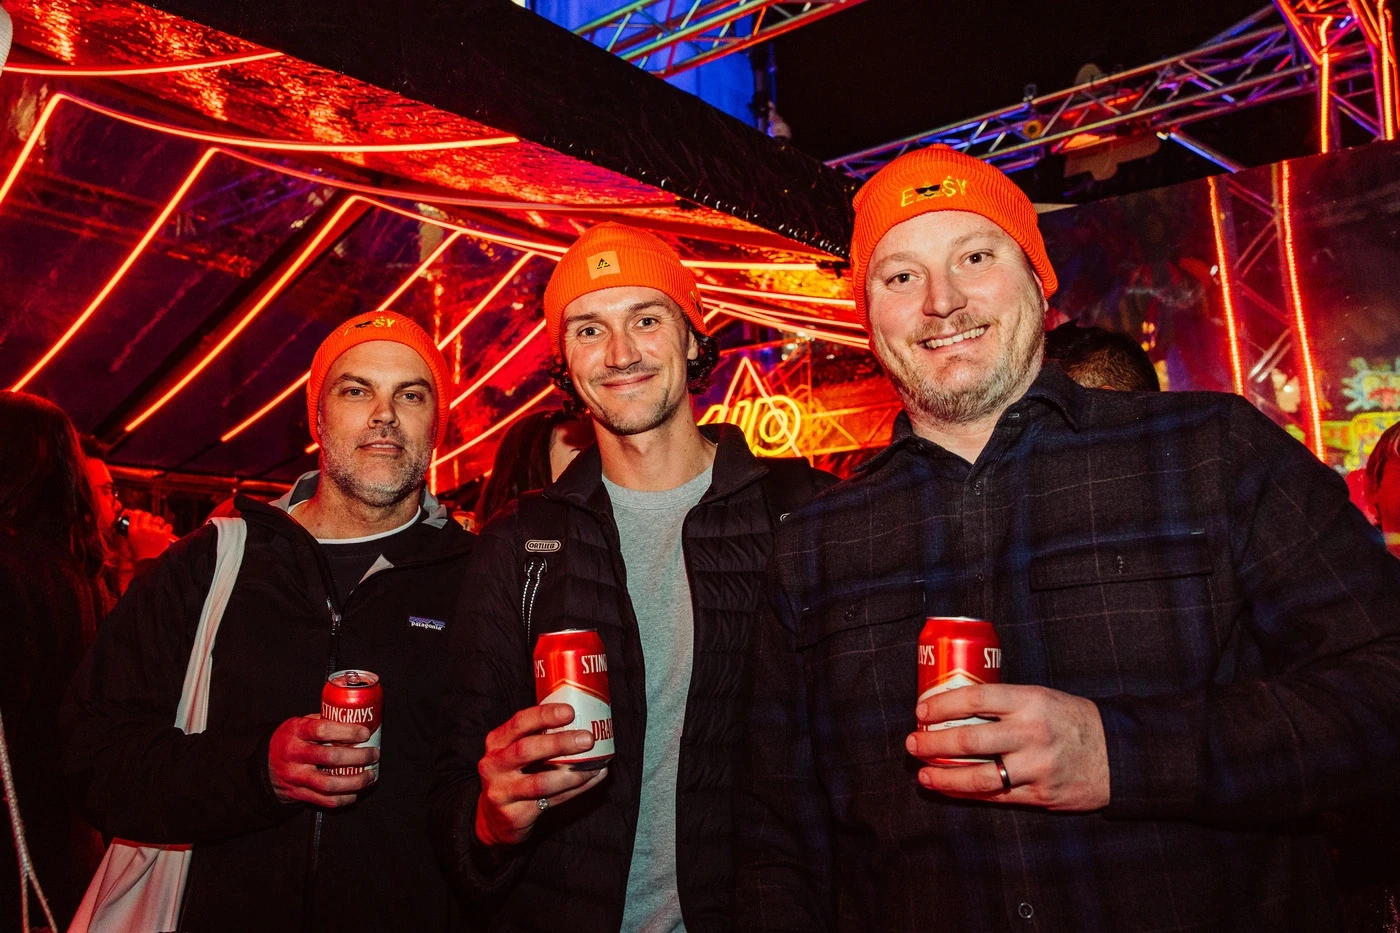
Up beanies and good vibes
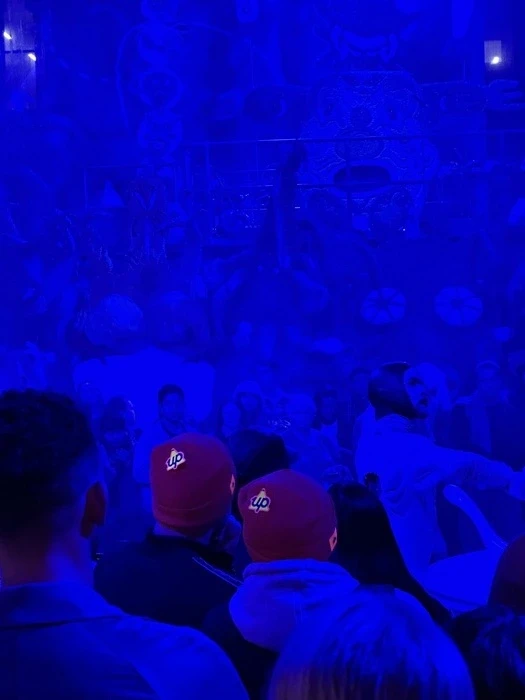
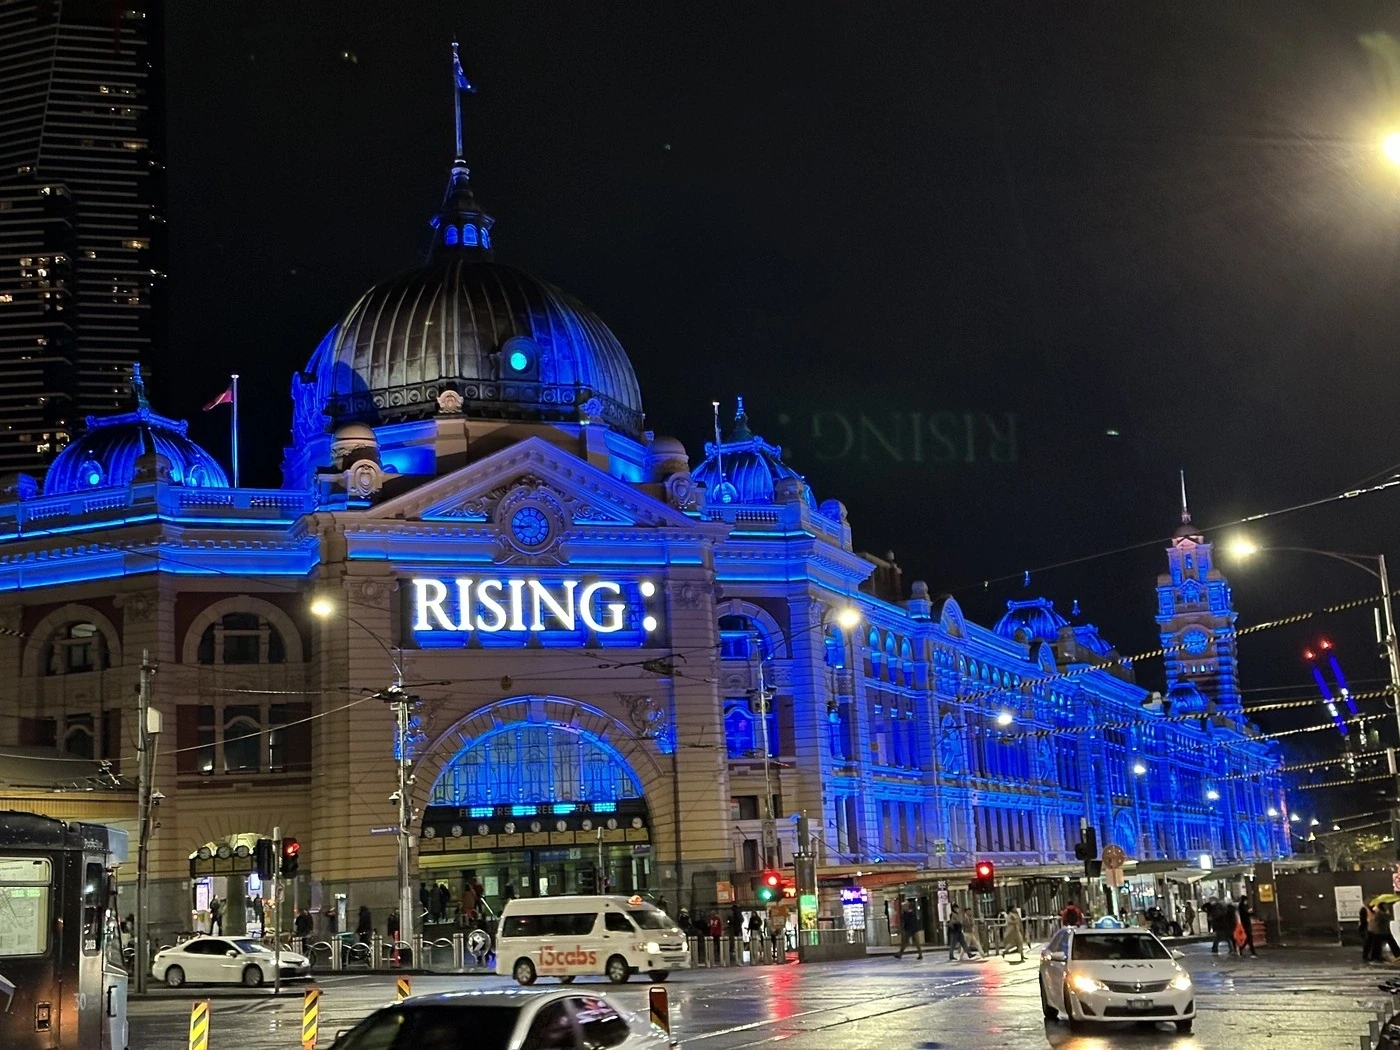
Opening night was a great. The Up presence was super visible to everyone in the space, and the mega-Zap was visible as you walked out of Flinders St Station. Distributing a couple of thousand beanies to people freezing in the Melbourne winter made it impossible to be in this iconic and uniquely Melbourne space without seeing Up.
Alongside the animation and activation we also ran a live cashback promotion which rewarded Upsiers for visiting the Up bar and using their Up card or digital wallet win an instan $5 cashback. Being able to do this sort of realtime banking is a very great superpower of Up tech.
All up it came together really well. I'm super proud of what we were able to accomplish as a team working together in such a short amount of time. Seeing Upsiders tap their card, and the entire structure lighting up was a huge buzz.
Credits:
So much of what we do only comes together because of a team effort and this activation was no exception.
- Branding design: Pete Johnson, Sharma Heylen Silvia, Nathan Borg, Aeroplane Agency
- Project management: Rukmal Da Silva
- Lighting & LED screens: Paul Tagell and Woohah
- LED visualisations: Anson Parker and Brian Oakley
- API and data supply: Andrew Carson.